Relining Rifle Barrels
feature By: Steve Rhoades | April, 18
There are several reasons for relining a rifle barrel. Restoring the bore condition is the most common, but with relining you can also change the caliber by selecting a liner with a different bore size than the original barrel. I’ve been doing this a lot lately, such as reducing a .45-70 to a .38-55 and making a .17 caliber into a .32 caliber. The availability of some brass sizes also gives
The barrel being relined in this feature is from a ’73 Winchester manufactured in 1889 and chambered in .32-20. The rifle is in pretty rough condition externally, and the bore was very pitted and dark; not a normal candidate for restoration, but my friend Kenny Durham in Boise, Idaho, likes to bring these relics back to life. He asked me to start the project by relining the barrel and chambering it to the original caliber. The first thing that needed to be done was to select the proper liner with the correct bore size and twist for the caliber for which it will be chambered.
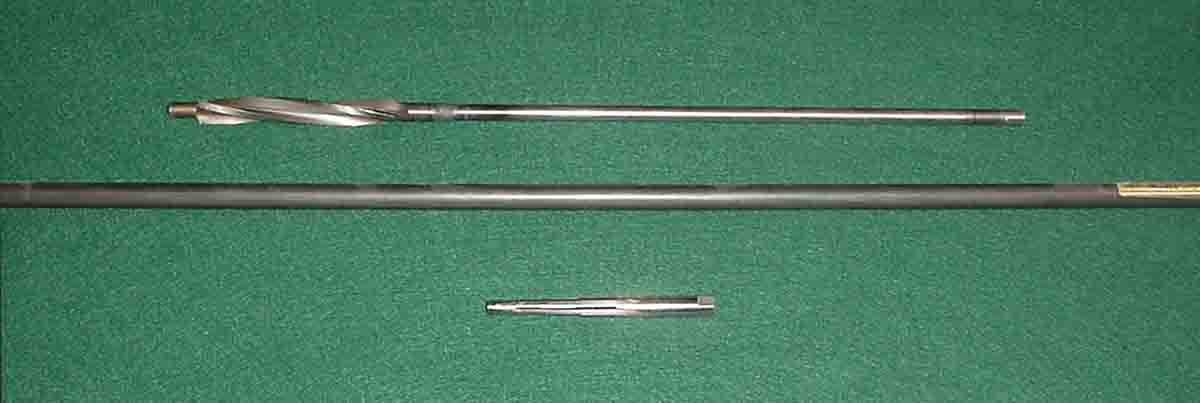
I use liners from T.J.’s Liners (contact information is provided at the end of this feature), and in this instance, a liner was selected that is made just for .32-20s with a bore size of .305 inch and a groove size of .312 inch. It is furnished with six-groove rifling and a 1:16 twist. The liners are sold by the inch, so I always order it at least an extra inch or two in length, allowing it to extend past the barrel ends when installed.
For this liner, I will need a .5-inch diameter drill bit. An extension to the drill shank needs to be added to allow it to go at least
I started by disassembling the action so that the barrel could be removed from the receiver. I don’t have a dedicated barrel vice, so I used the vice on my milling machine to hold the barrel while the receiver is unscrewed. Whatever method is used to hold the barrel, the most important thing is that it never moves during this step of the operation. Any movement of the barrel will cause it to be marred, so holding it tight is really important.
I have several action wrenches of different sizes that fit into the inside of the receiver. In most cases a good smack on the end of the wrench with a rubber hammer is all it takes to loosen the receiver and allow it to be unscrewed the rest of the way by hand. In some rare cases, heat will need to be applied to the receiver in the area of the barrel threads. Raising the temperature of the receiver around the threaded portion of the barrel will expand the receiver allowing its removal. Be careful with this operation, the area only needs to be warmed up. You do not want to cause a color change to the receiver. If the barrel has been installed with Loctite during previous work, the heat will also break the Loctite bond.
A .32-20 has a bore size of .305 inch, so I selected a pin that just slides into the bore. Sometimes when the bore is really bad, a slightly larger pin will be needed for the set up. Imported pin gauge sets are surprisingly inexpensive and really come in handy if you are a gun crank. They are also handy for checking bore sizes for bullet selection.
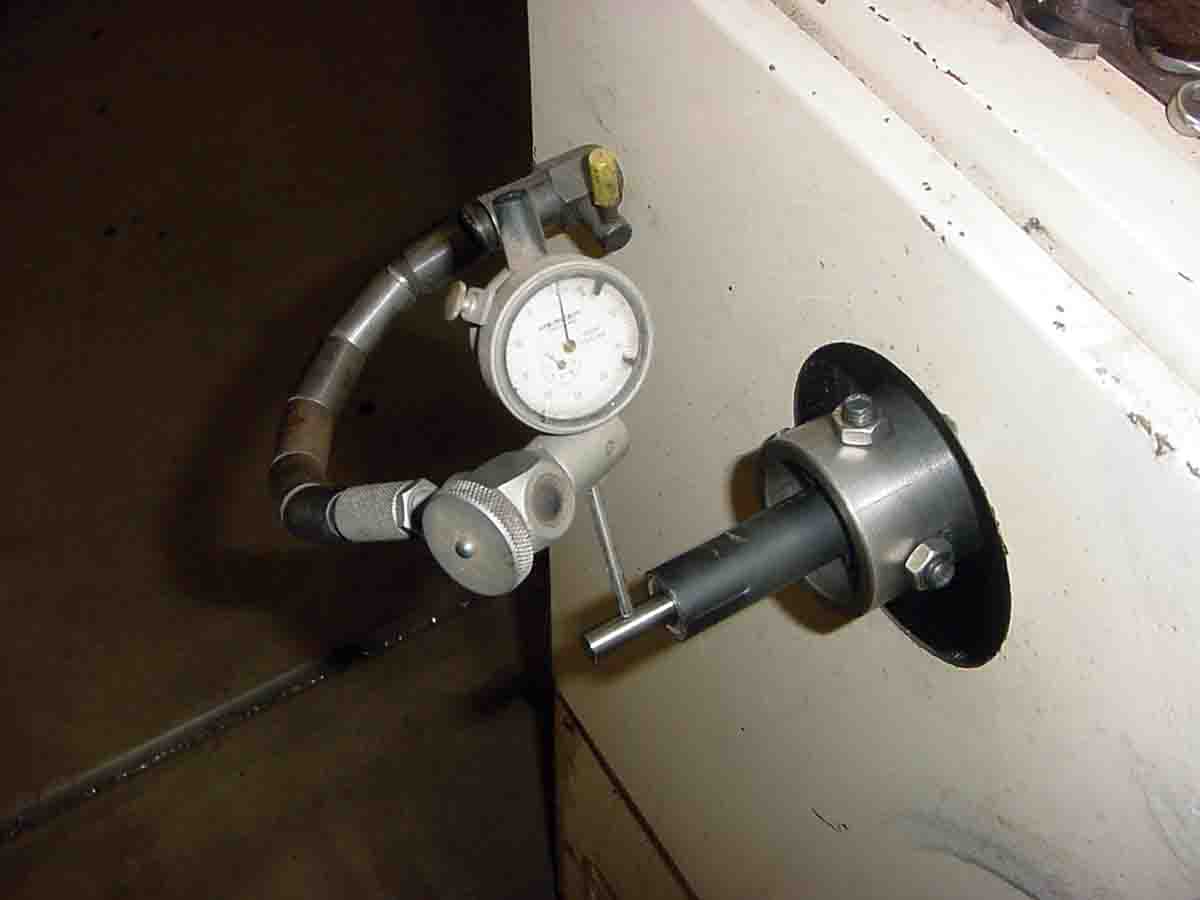
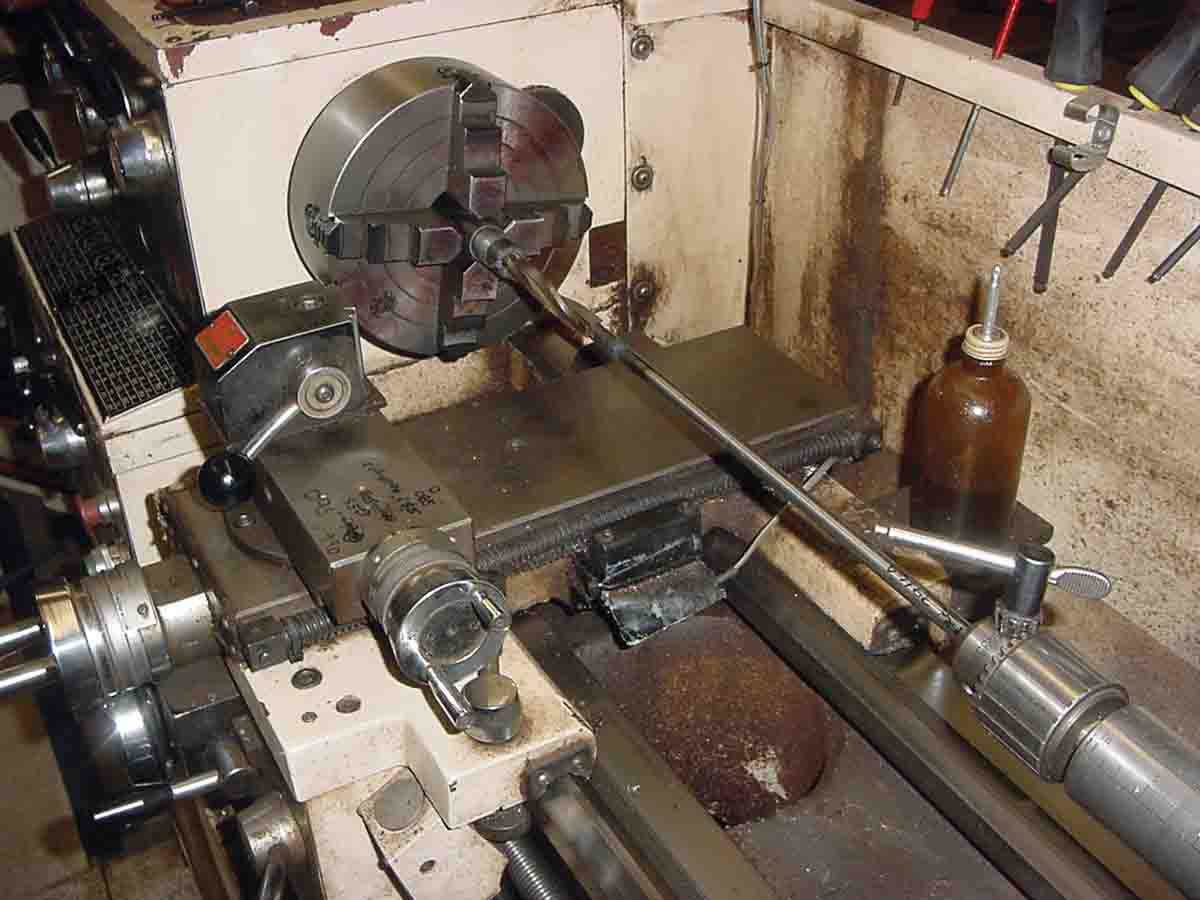
I use a four-jaw chuck in my lathe to center up the barrel and either a four-pin adjustor called a “spider” or a sleeve in the headstock bore to center the other end while the barrel is being bored and finally chambered.
In the case of this barrel, which applies to most lever-action barrels, it isn’t long enough to go all the way through the
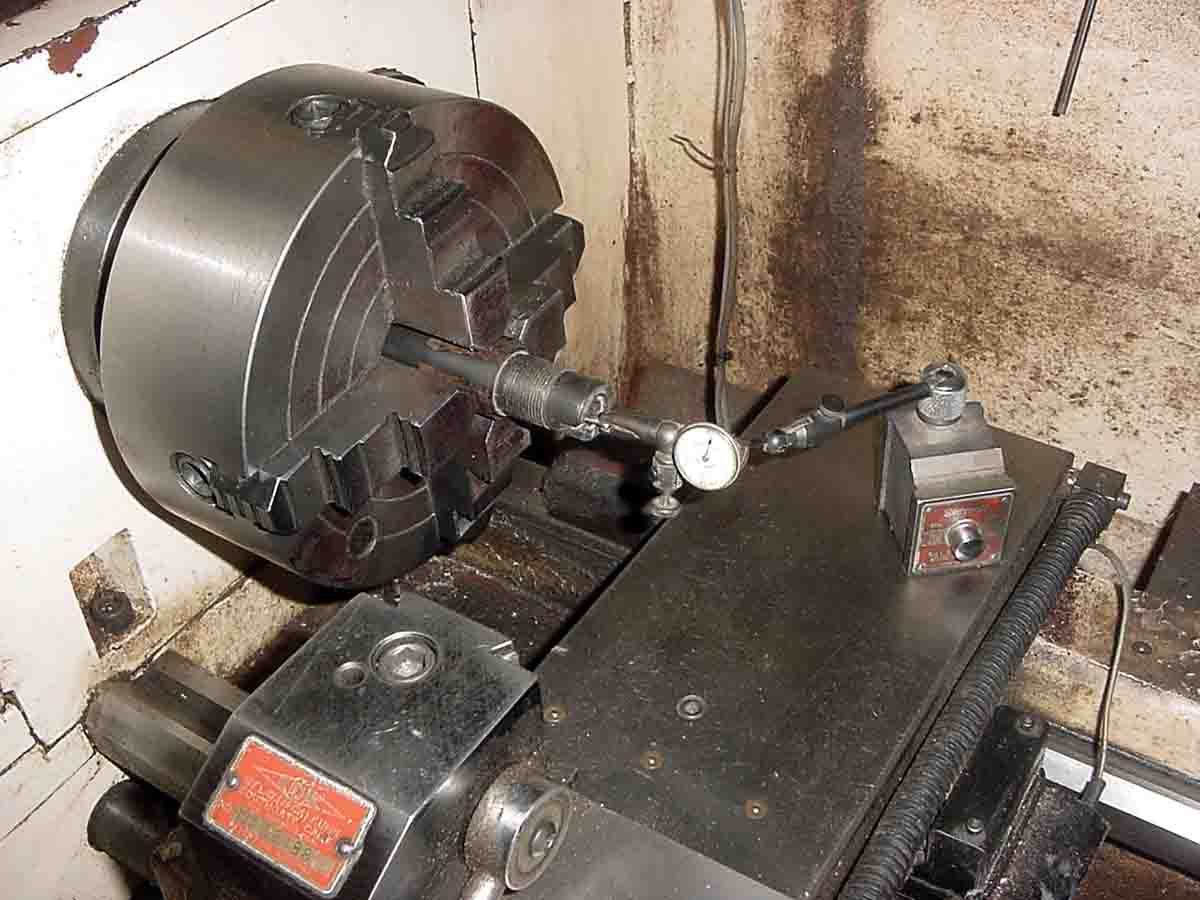
With the proper pin gauge slid into the barrel’s bore, the barrel is centered in the four-jaw chuck using a dial indicator. Try to get the run-out less than .001 inch for all of the operations.
Now the fun begins! Drilling the barrel is a slow process, as the drill needs to be removed and the chips cleaned off about every inch of cut until the end of the drill is reached. This can take as long as 30 minutes to go halfway into the barrel. I use Tap Magic cutting fluid for both the drilling and the chamber reaming. This fluid has worked well for me, but there are surely other products that can be used for the drilling process.
After drilling through half of the barrel, it is removed from the lathe, turned around, the other end is indicated in and the drilling is resumed. If everything has been done correctly you will feel the drill pass into the previously drilled section in perfect alignment.
The barrel is then removed from the lathe and the chips blown out. I use a cleaning rod with patches soaked in acetone to clean the freshly bored barrel.
At this time, I decided to do some repair work to this barrel before installing the liner. Someone had evidently tried removing the barrel with a crescent wrench – believe me, this doesn’t work – and left some pretty deep gouges on the surface of the barrel in front of the receiver.
TIG welding filled in the dents and a little draw-filing got everything back to normal without removing the original caliber markings. The welding needed to be done before the liner was installed, so the heat wouldn’t affect the epoxy that will be used to install the liner.
Before installation I chucked up the liner in the lathe and roughed it up with 80-grit sandpaper so the epoxy will have a good grip. The bore was already rough from drilling, so it was ready to go after the cutting fluid was cleaned out with the acetone-soaked patches. The liner should also be wiped down with acetone to remove any oil on its surface.
I use West System’s epoxy #105 Resin and #206 Hardener. The company makes a fast-curing hardener, but I like to let everything cure overnight. Instead of taking a chance of it going off too quickly, use the slow-drying stuff. I also use the same epoxy for bedding stocks and other general repairs.
I mixed epoxy in a paper cup and poured a small amount down the barrel. I then ran a ribbon of it onto the surface of the liner. After plugging one end of the liner to keep the epoxy out, I slid it into the barrel while rotating it back and forth to ensure the full surface of the barrel and the liner have an even coat of epoxy. The barrel is now cleaned of any excess epoxy on the outside and set aside to dry overnight.
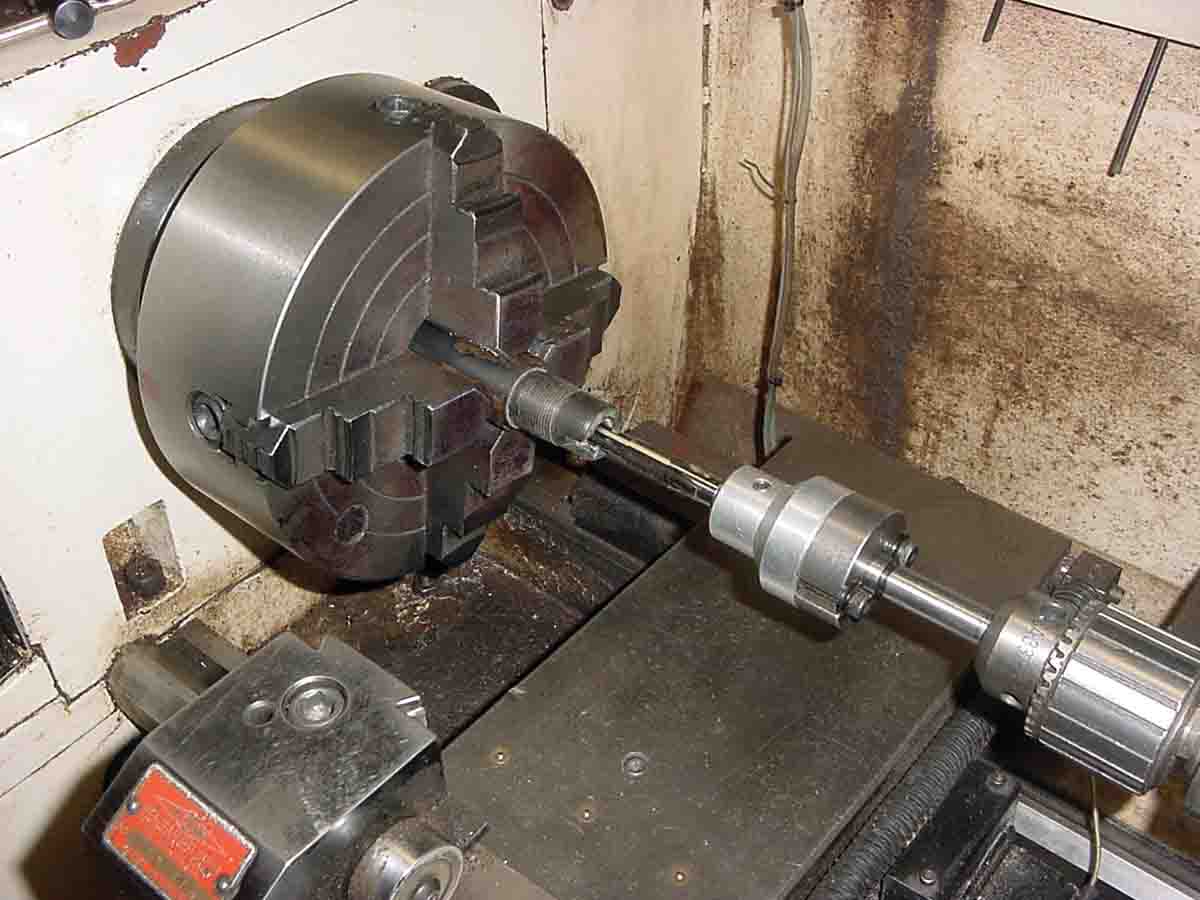
The next day the barrel goes back into the lathe, indicated in with the pin gauge installed in the new liner, and the chamber end is machined off to the proper length to establish the correct headspace. I always check this dimension by installing either the bolt or the block in the receiver and measuring the depth of the face to the end of the receiver that will tighten up to the barrel. Try to get zero headspace, but make sure the block or the bolt will close easily.
.jpg)
The reamer is now installed in a special reamer holder and chucked in the tailstock that allows the reamer to correctly center its pilot into the bore of the liner.
Run the lathe speed almost as slow as it will go, somewhere around 60 rpm, then coat the reamer and the liner’s bore with Tap Magic, and slowly feed the reamer into the bore, removing it often to remove the chips that accumulate. Make sure to recoat everything with Tap Magic before continuing the cut. You can’t go too slowly with this operation as any chip build-up will score the chamber area.
Just before full depth is reached with the reamer, clean off the end of the barrel and spray it with Dykem Blue Steel Dye so the rim-cutting portion of the reamer can be seen when it just touches the end of the liner. At this point the chambering is finished for this barrel, but in the case of a single shot action, a recess will need to be cut to the exact depth of the cartridge rim. When doing this, just touch the reamer to the liner, reset the tailstock dial to zero and then feed it in to the proper rim depth.
The actual chamber is now cut, so if you have a test case or dummy round it can be checked for fit before removing the barrel from the lathe.
If everything looks good and the rim cut is correct, remove the barrel and restore the extractor cuts in the lined barrel. This is usually done with a small file for the lever-action barrels, but sometimes it needs to be done in the mill with a small t-slot cutter. Make sure to deburr the chamber end after the reaming is completed and also after the extractor cuts are made. I use a small handheld deburring scraper for this. It’s now time for the barrel to go back into the lathe to cut the crown.
The same indicating procedure is followed and the excess liner material is machined off. For vintage lever-action barrels, make the muzzle cut square with the bore. Try to duplicate the original crown if possible. On large-diameter target barrels, cut an 11-degree crown with the change from square to 11 degrees made on the edge of the liner. This helps to disguise the liner’s part line.
Round barrels can have a radius filed on the outside edge in the lathe, but for octagonal barrels I remove them from the lathe and carefully file a flat on each of its eight sides.
At this point the reline work is complete. If the finish on the barrel is good, I touch up the blueing on the crown and the breech end of the barrel before installation into the receiver. Reassembling the rifle and checking for proper feeding and extraction is all that is left to complete the job.
The barrel used in this article won’t get reinstalled, as it needs to be draw-filed and polished for the rust blueing which will be done following the rest of the restoration to the rifle. But that’s another story.