Reaming a Revolver
feature By: Cody Smith | August, 20
I have more Ruger single-action revolvers than my wife thinks I need, but they are rather dear to my heart. Several of them shoot extraordinarily well, considering they are production guns. My basis for accuracy in a handgun is found from shooting six-shot groups at 25 yards from a rest. Personally, I find anything that won’t make a two-inch group under those conditions rather uninteresting. Good accuracy is around an inch and anything under an inch is great.
I had always kept an eye out for a “three-screw” .357, but never managed to find one that was in decent shape, shot well, and was affordable. In 2005, Ruger produced a 50th Anniversary model of the .357 Blackhawk and it was built on a medium frame. One sold on Gunbroker.com not too long ago, and I ended up the high bidder. First impressions of the gun were very good. This time around, Ruger used a steel frame instead of the alloy frame used in the three-screw models, so it is a little heavier than the old ones. It is just enough smaller than the large frame models that it feels good and points just right. Fit and finish is excellent and the cylinder lockup and gap are very tight. Multiple range sessions resulted in groups in the two to three-inch range. Not terrible, but I was disappointed. Yep, you guessed it; I had to go to messing with it.
After digging through several books, consulting the internet, and interrogating knowledgeable friends, I came up with a list of things to check out and possibly do. After inspecting and measuring just about everything, I found no real reason for a problem. Chamber throats measured perfectly, the barrel slugged just right, cylinder gap measured a very tight 0.003-inch, and no misalignment could be detected between the cylinder and barrel. My research then turned to the forcing cone.
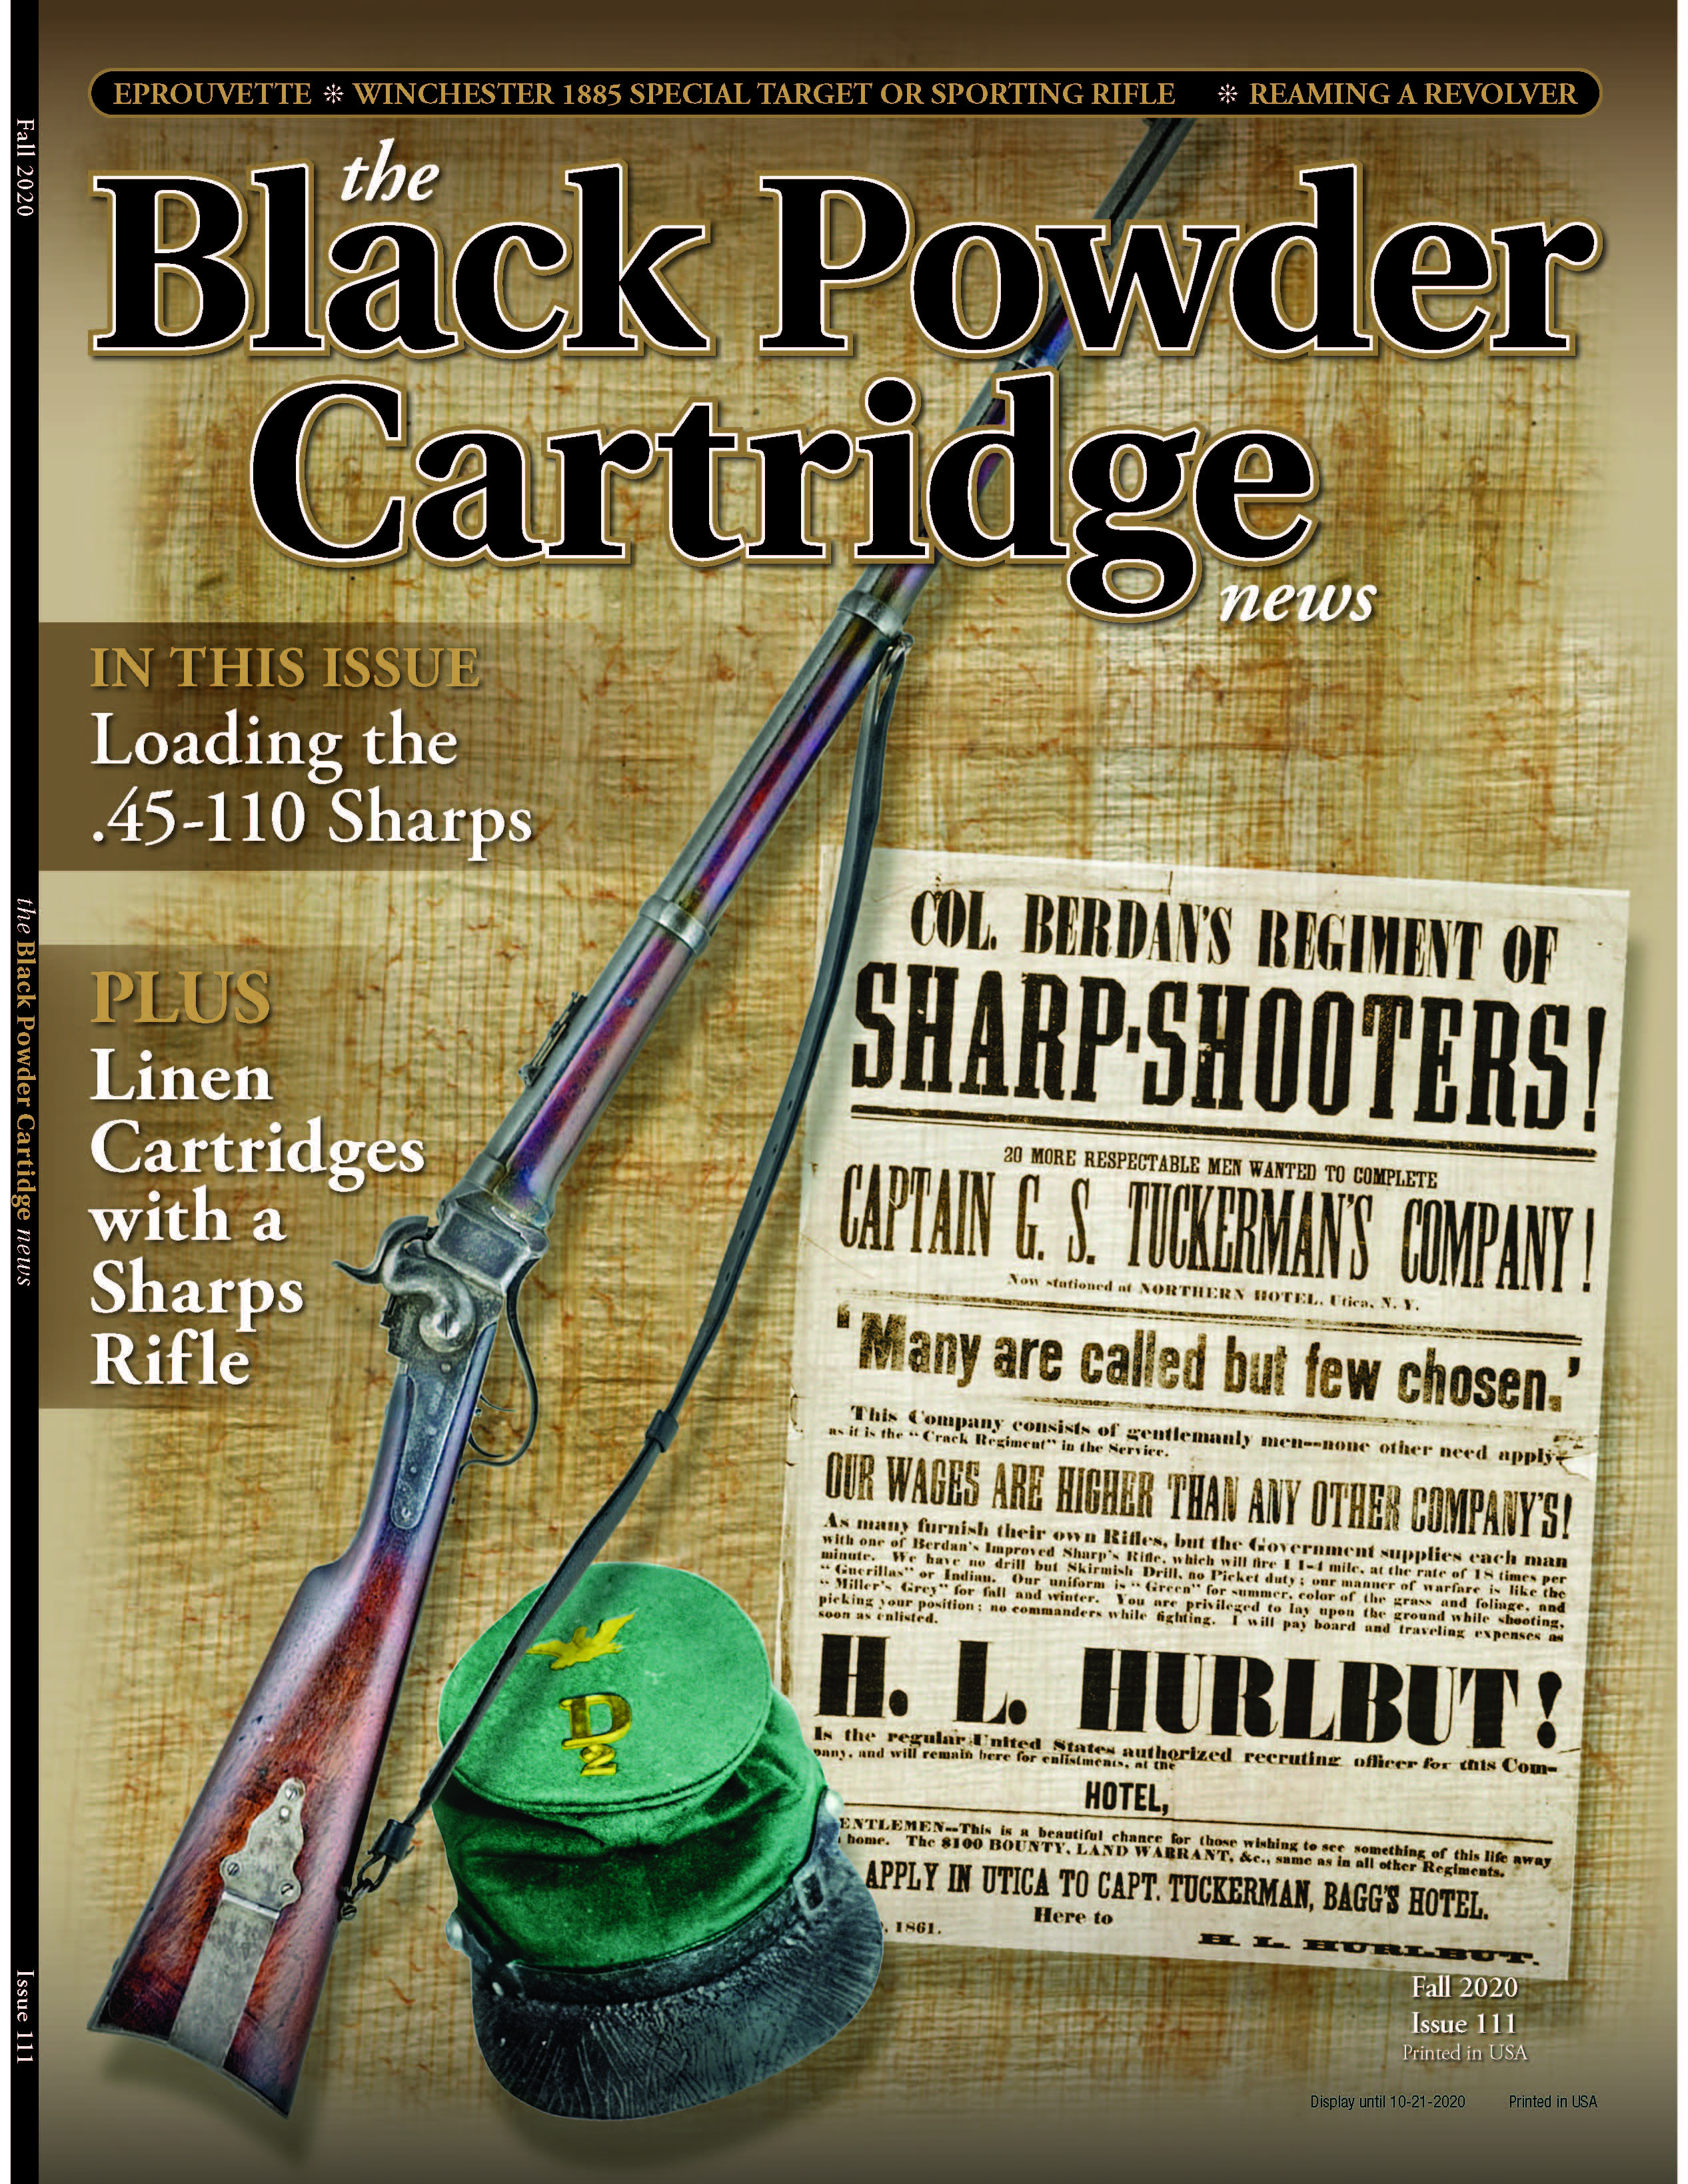
For those that aren’t sure what the forcing cone is, it is the small section of the barrel closest to the cylinder. It is funnel shaped and directs the bullet into the rifling. The consensus between various experts seems to be that most factory forcing cones are too large. When viewing the forcing cones on my Freedom Arms or various other custom revolvers, it is obvious that they are quite a bit smaller than on my factory Blackhawks. This is possible because of the extremely tight tolerances the high-end guns are machined to, and the fact that they have absolutely perfect barrel/cylinder alignment. Production revolver tolerances are not nearly as tight, and the factories feel that they need a larger forcing cone to account for poorer barrel/cylinder alignment. The only way to fix an oversize forcing cone is to either rebarrel the revolver, or set the existing barrel back and recut the forcing cone.
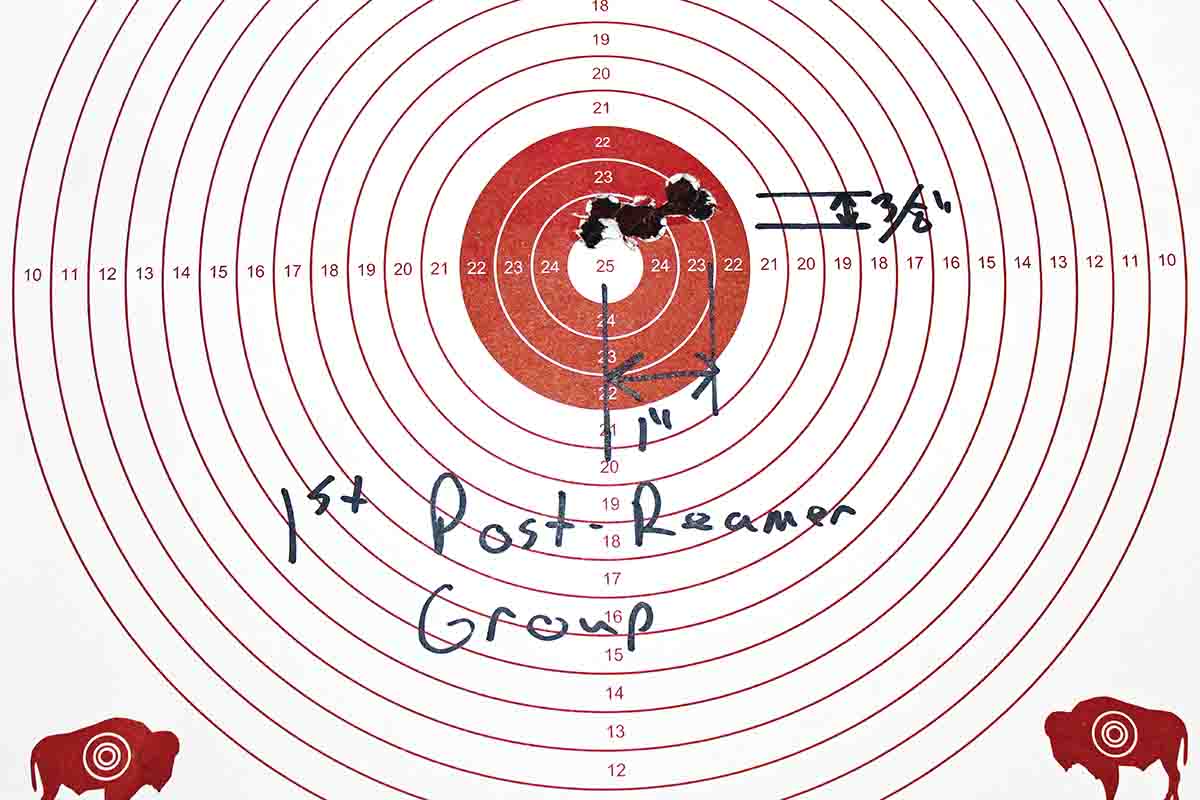
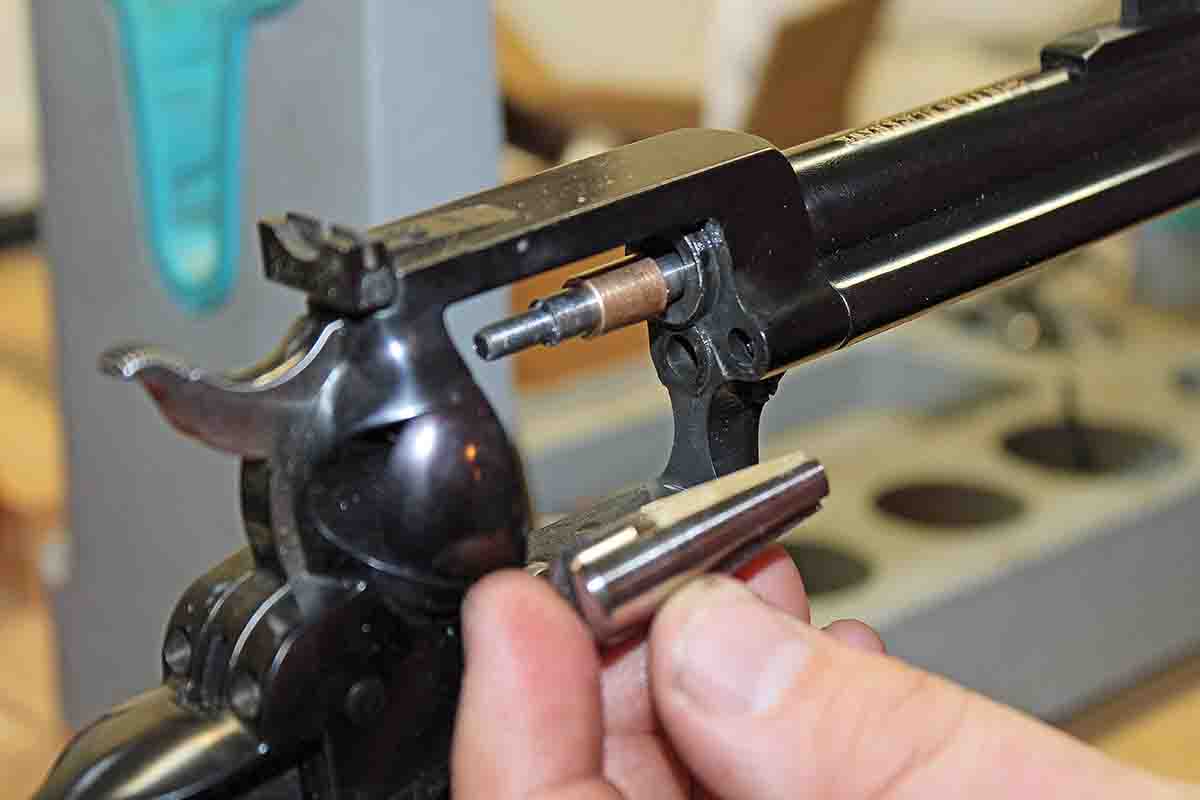
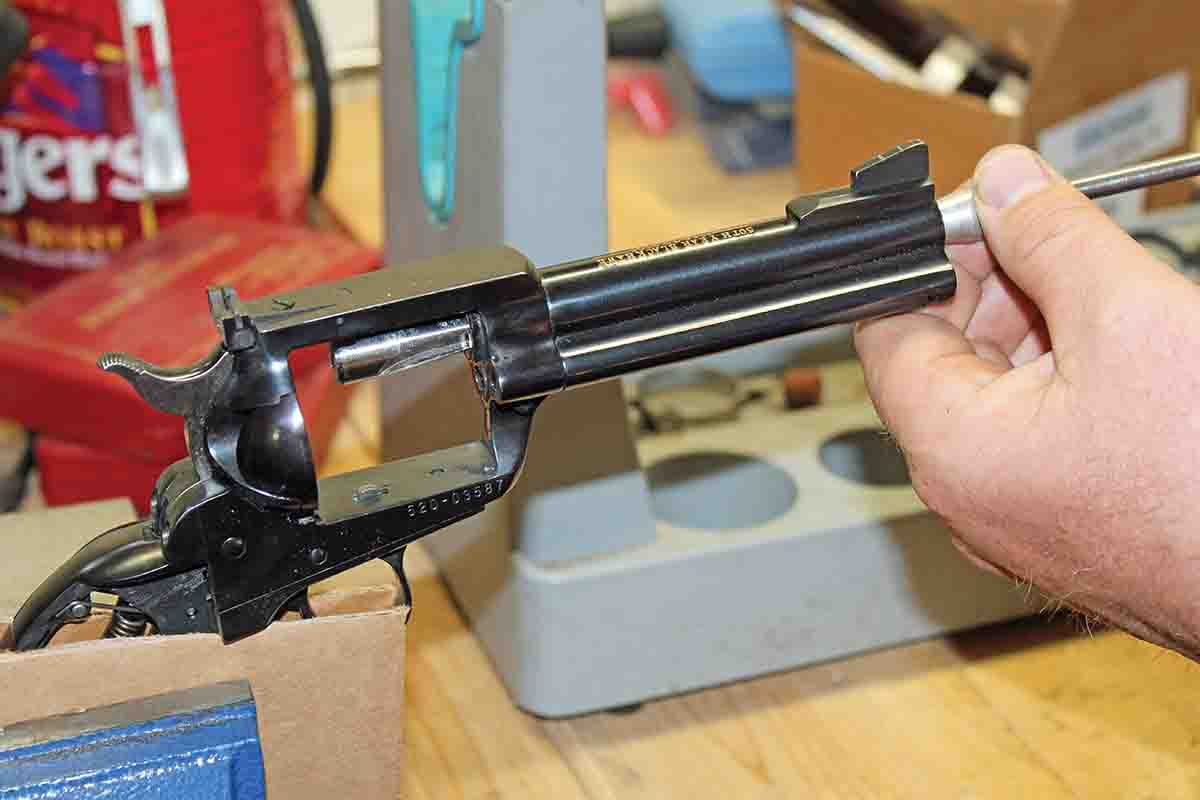
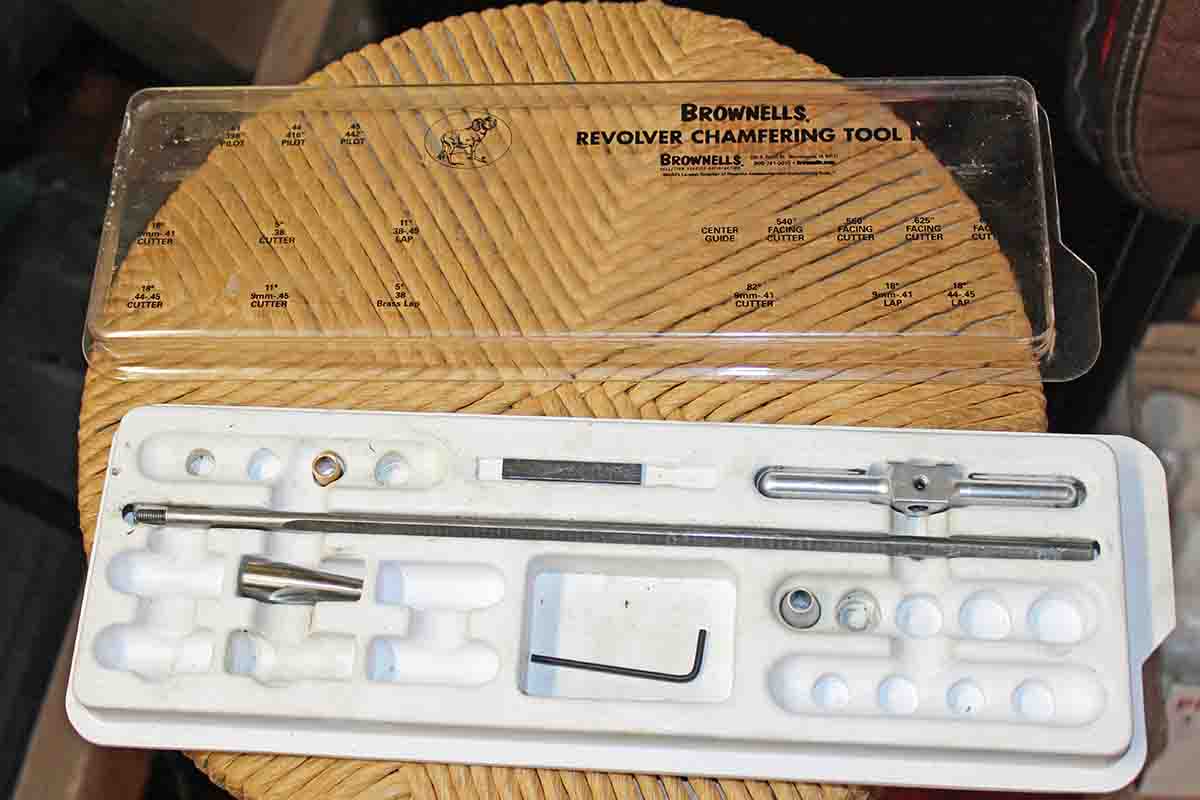
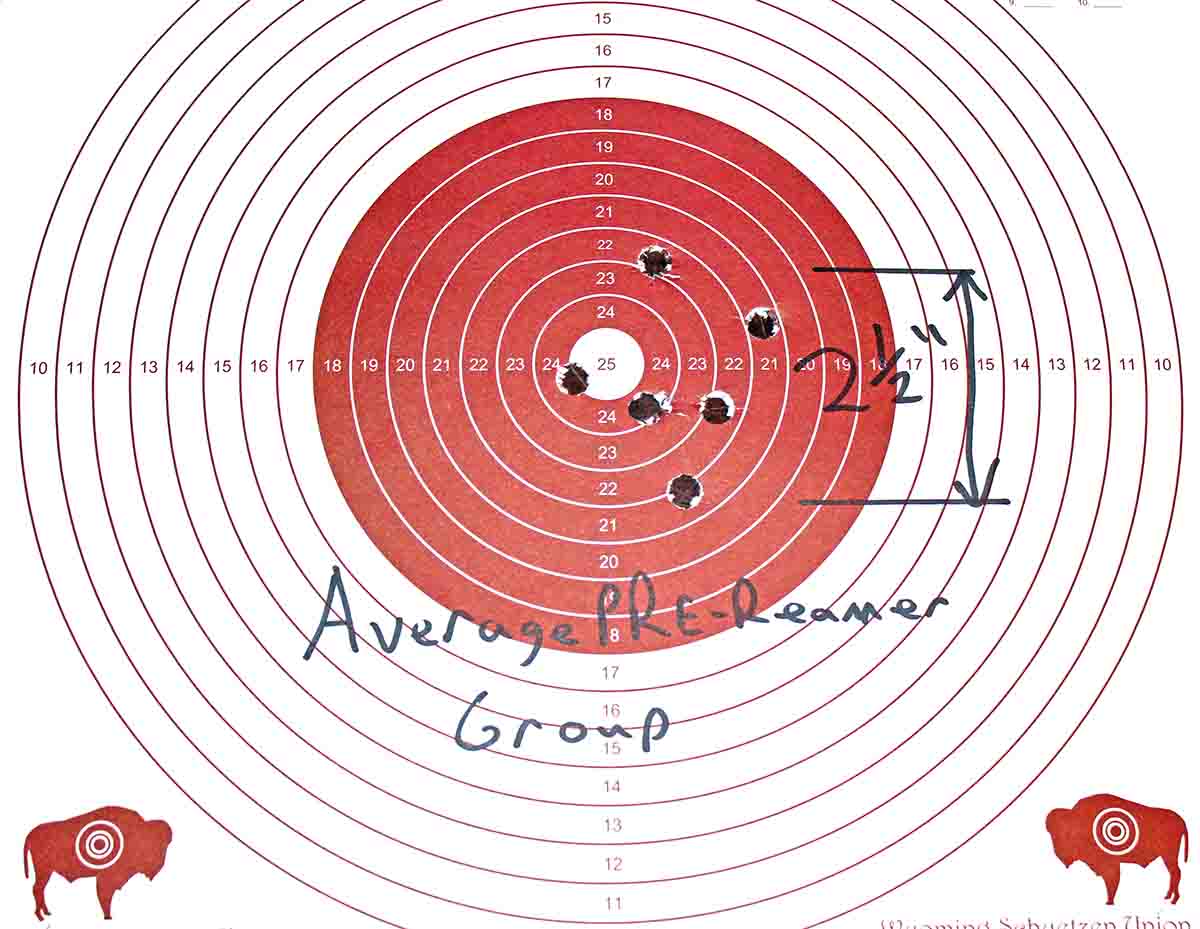
The kit arrived several days later. It is a rather simple affair consisting of a cutter resembling a cartridge chamfering tool, a rod, a handle, and some bushings. As you can see in the pictures, after the cylinder is removed from the gun, the rod is inserted through the barrel and screwed into the cutter. It is held in the center of the barrel with the bushings. With the help of a handle and a few drops of cutting fluid, the cutter is pulled into the forcing cone and rotated with even pressure. The big thing is to be cautious and not remove too much material. It is best to make a small cut and then test for accuracy, then repeat if more is needed. I did three revolutions on mine and just the very smallest amount of steel was removed. Thinking about the time I filed too much off of a fixed front pistol sight, I quit and went to test fire it. I had removed so little material, I wondered if I had actually done anything, but the results were astonishing. After several hundred rounds of various handloads, the groups before the reamer was used averaged about 2.5 inches. The very best group was 1.5 inches. After using the reamer, the first group shot was just 3⁄8 inch tall and one inch wide. The horizontal spread was likely due to the ever present 30 mph wind I was shooting in.
4-D Reamer Rentals is located in Kalispell, Montana and can be reached by calling 406-752-2520 or via their website at 4drentals.com.