Black Powder Shot Shells
Easier Than You Might Think
feature By: Bill Goodman | November, 20
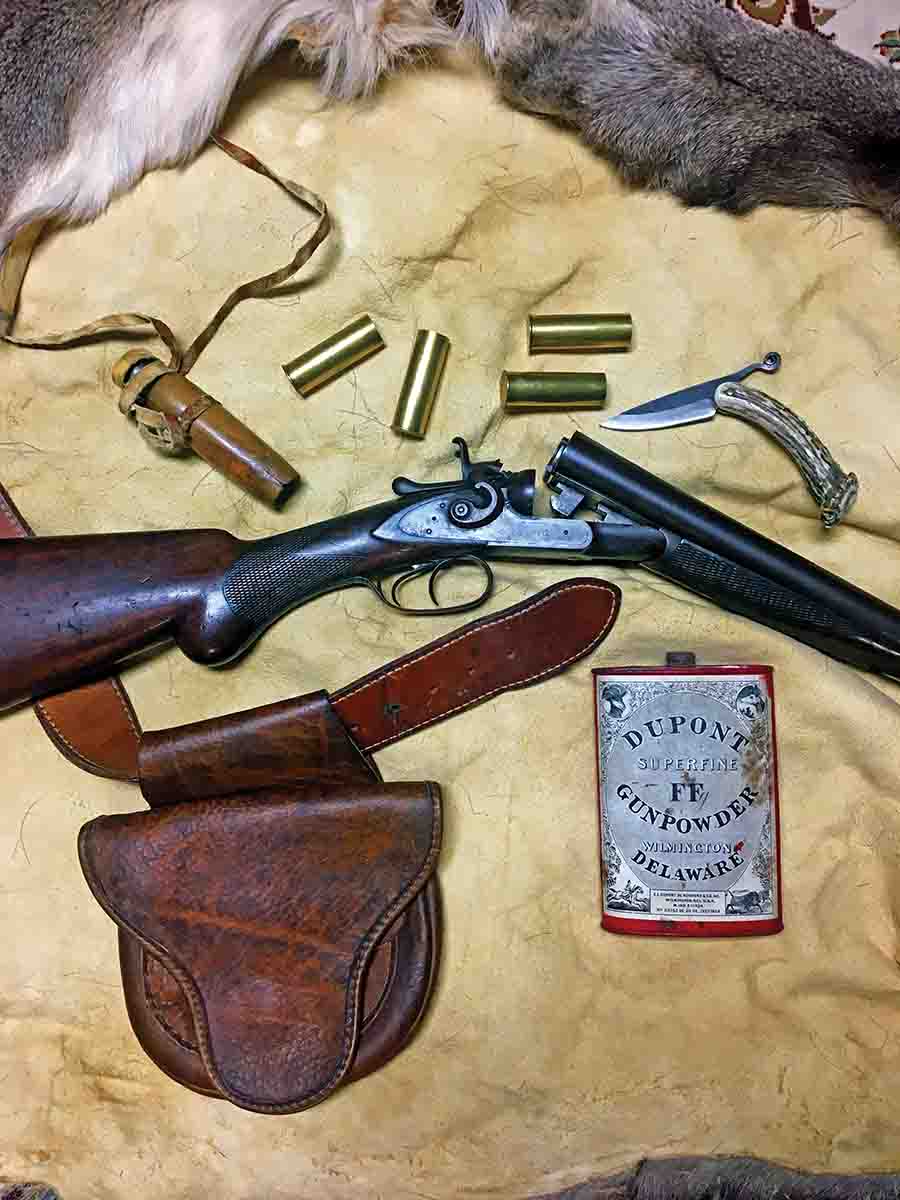
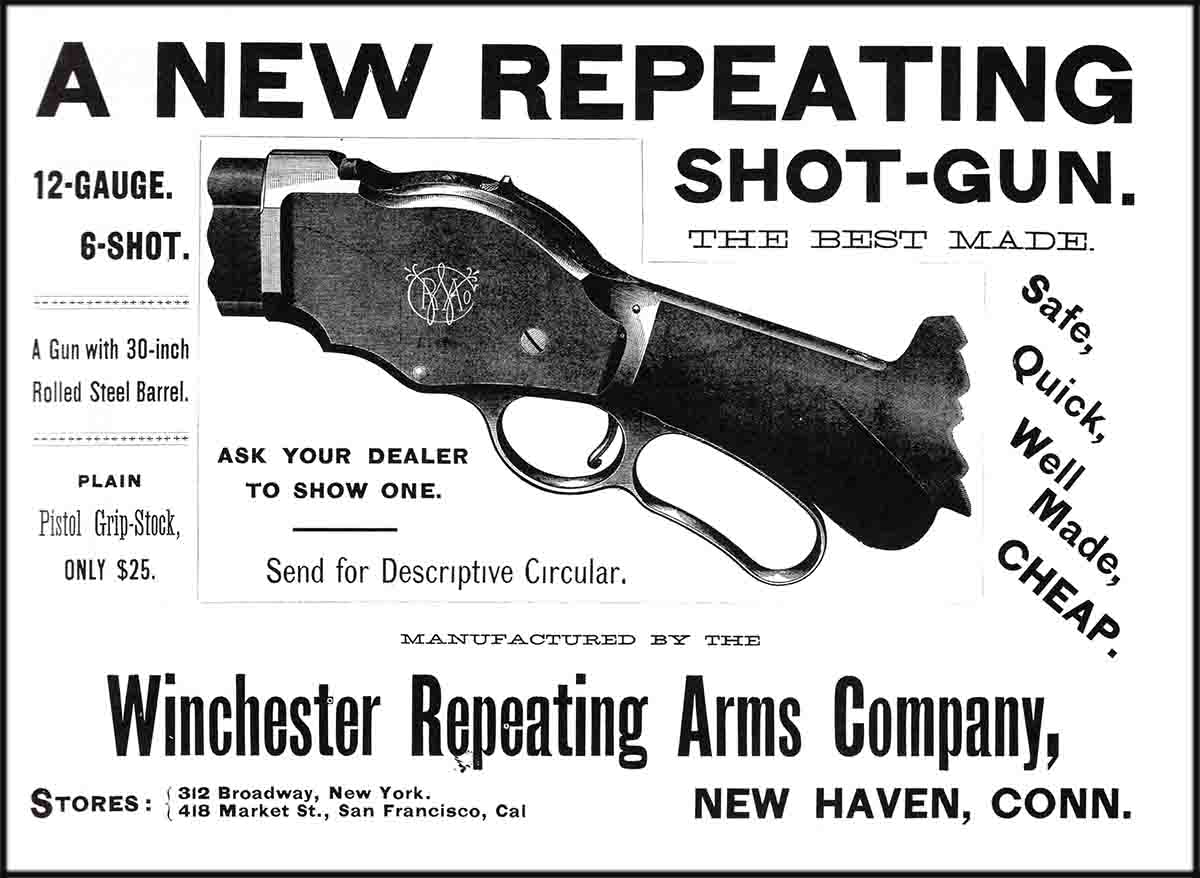
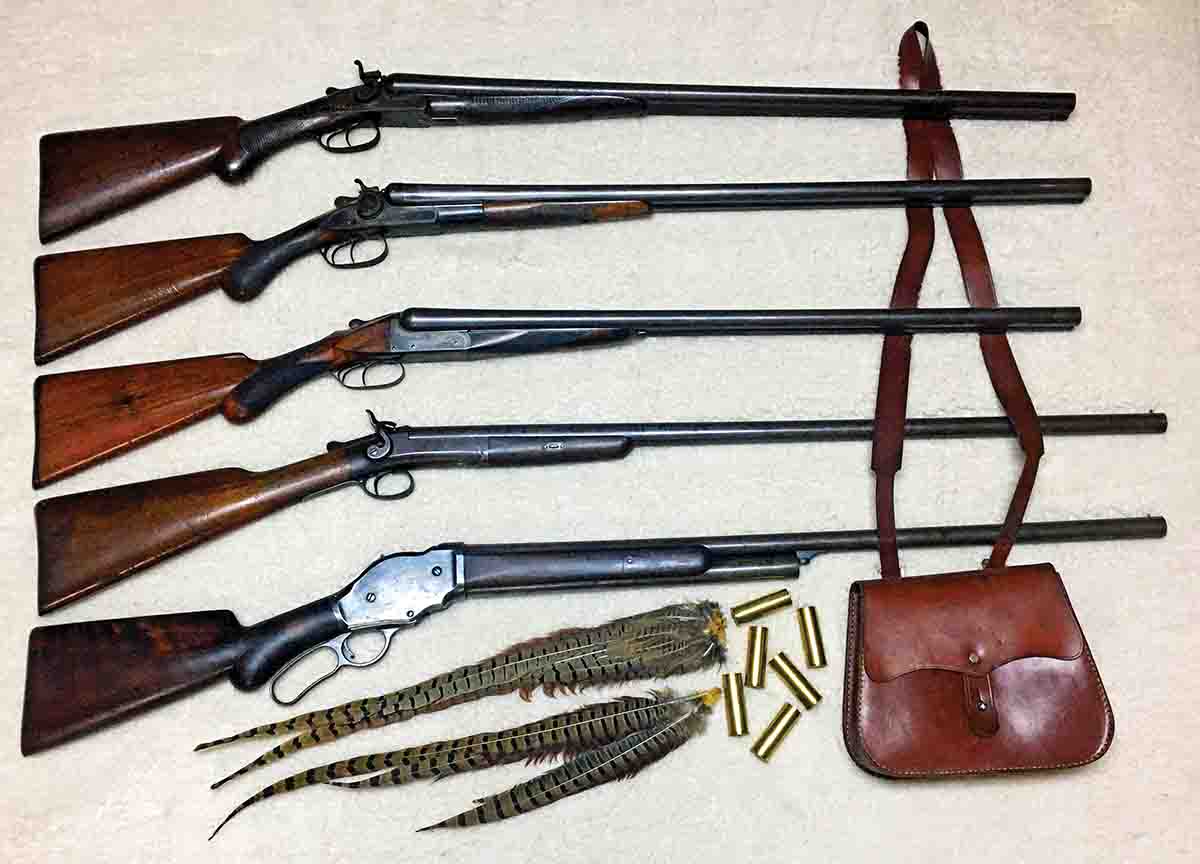
Here’s a rundown on the shotguns I shoot. A favorite gun is a fairly heavy Colt Model 1878 hammer double that according to the Colt archival letter, was shipped in early 1879 to a Philadelphia, Pennsylvania, dealer. This one, with 30-inch barrels, weighs nearly 9 pounds and because of this substantial weight, soaks up recoil wonderfully. I also shoot a fine Remington Model 1889 double hammer gun with 28-inch barrels made early in production along with another early production Remington Model 1894 hammerless double. The latter Remington is relatively light and recoils briskly. The side-hammer single barrel gun (shown in the accompanying photo) was made by Forehand and Wadsworth in Worchester, Massachusetts, who operated between 1871 and 1890. It weighs a wispy 6¾ pounds and recoils fiercely. These rare guns were purely utilitarian and examples in any condition are almost nonexistent. This one is not mine, but was graciously loaned for this article by shotgunner extraordinaire Vincent Salvia of Bozeman, Montana. My last scattergun is a second-year production Winchester Model 1887 lever gun with 30-inch barrel. Unlike the other doubles, it has a steel barrel. The Winchester is somewhat ungainly compared to the svelte side-by-sides, but with its lever action mechanism is unique to large bore shotguns. Firing rapid second or third shots is a challenge. But let’s be real here, this is all for fun. An awkward antique lever action 12-gauge gun, brass shotshells loaded with black powder – if you are reading this magazine you know it doesn’t get much better than this!
Now that we have that out of the way, let’s examine a very easy way to load black powder shotshells. Few tools are needed and those that are can either be made or purchased inexpensively. First, let’s start with the hulls. Magtech Ammunition makes very high quality brass shells in a number of gauges (but unfortunately, not in 10-gauge). My black powder shotguns are all 12, so that’s what I’ll refer to here. These bright and shiny 12-gauge beauties are sturdy, and mine have been fired numerous times with no signs of distress. They are 2½ inches in length, so they will fit about any chamber that might be encountered. They are made for large pistol primers and if there is a reason for this, I’m not aware of it. Regardless, I’ve been using CCI 350 Large Pistol Magnum primers and they seem to do the job nicely. These Magtech shells come 25 to the box and sell for the equivalent of about a dollar per shell. Considering their ruggedness and longevity, they are a bargain.
Rather than start this loading sequence with new brass, let’s assume you have a bunch of fired cases to reload. First, deprime the fired shells. You’ll need some kind of depriming rod; I use a simple Lee depriming rod and a mallet. To deprime a fired shell you’ll want to center the brass hull over a solid piece of wood or steel with an appropriate size hole for the spent primer to fall through. Depriming can be a little tricky at first, as the brass Magtech shells are balloon head, not solid head. It takes a little finesse to find the flash hole with the Lee punch, but this is easily accomplished by feel. You’ll know when the pin sinks into the flash hole. A light tap and you’ll be ready for the next fired shell. One of the pictured depriming tools can be used, but again, centering the pin in the balloon head case can be a slow process. When all are deprimed, the brass cases are cleaned like any other black powder cartridge case. We all have our preferred methods, so use what you are used to and what works for you. Once cleaned and dried, a couple of hours in the case tumbler make them once more look like shiny-new.
Now it’s time to reload. As for loading tools, the number is small and the complexity is nonexistent. RCBS makes a shell holder for these cases, which makes priming easy on any press that will allow priming or with a priming devise that takes standard shell holders. If you don’t have a press or priming tool, the old tried and true primer on a flat surface and “mallet-with-dowel” should do the trick.
Concerning powders, as a traditionalist, I’ve used Swiss and GOEX, but fouling buildup can occur pretty quickly. As we all know, cases will require a good scrubbing to avoid rapid ruination. Now, I may need to go to “Black Powder Confession” over this admitted transgression to confess my sins, because I now use a black powder substitute almost exclusively for clay shooting. For hunting I’ll use black; I don’t want to offend the ancient spirits by using anything but original black powder when in the field. The trial of a certain black powder substitute brand began because it was so cheap ($9.95 a pound) and readily available. The powder is called Alliant Black MZ powder. I read good reviews about it online and for that price, thought it worth a try. The initial results were totally satisfying. The boom and smoke were about the same as with black. Recoil was as painful as black. I hit (or missed) clays exactly as I did with black. But fouling was minimal in both bores and cases, and cleanup was quick and easy. A couple of wet patches down the bores with any kind of black powder solvent left zero powder fouling. Don’t bother trying a smokeless powder solvent like Hoppe’s No. 9. It won’t touch this stuff. I know because I tried. A drying patch followed by oil and that’s it. Done! Same with the cases; hot, soapy water, a short pistol cleaning rod with cloth patch and nothing to it. I’m told Black MZ has been discontinued; this is very disappointing, as I don’t know what I’ll do when my long shelf of multiple cans is gone. The reason you might not be able to find Black MZ powder is because I think I cornered the market on the stuff.
It’s time to talk about actually stuffing your primed cases. I typically pour 95 grains (by volume) of powder through my drop tube into each shell. I’ve used more and I’ve used a little less. This volumetric amount of Black MZ actually weighs about 83 grains. I consider this a pretty stout dram equivalent game load, as one dram equals a little over 27 grains. I measure each charge on an old Belding and Mull powder measure, but a powder horn and handheld black powder measure would work as well, just a little slower. Once filled, I line the cases up and they are wide enough that rarely do they knock over. Next, I put a Circle Fly 11-gauge 1⁄8-inch Nitro card in each case and seat it firmly with a short section of 5⁄8-inch dowel followed by a shot cushion wad. I use Muzzle Loader Originals preconditioned 12-gauge cushion wads. These fit really snug and have to be pushed into the cases with some effort. I use the palm of my hand. A thin leather work glove makes this part less painful. I seat the cushion wad with my dowel just as I do the Nitro card, but with one exception. After doing all the cases, usually a box of 25, I reseat all cushion wads just to make sure air pressure didn’t force them up and off the Nitro card. Being such a tight fit, you’ll want to wipe the rim of each case to remove the waxy residue from the “preconditioned-part” of the cushion wad.
A note about wad size: the brass shells are fairly thin and 12-gauge nitro and over-shot wads will be a loose fit, so 11-gauge wads are desired. The 12-gauge cushion wads are a tight fit even in the thinner brass cases. Also, I’ve used these shells in all of my shotguns interchangeably without sorting. The chambers must all be fairly similar because after firing the shells, which are reloaded unsized, they all seem to fit whatever gun I try them in. RCBS does make a 12-gauge resizing die, but I’ve never found a need to buy one.
Lastly, here’s the important part that I learned the hard way. You’ll need to glue that over-shot wad in place so that even under stout recoil things remain together inside your shell. I’ve tried several glues with varying degrees of success and one complete failure. The failure was using brown “foaming” Gorilla Glue. Trust me, you’ll want to stay away from this one. That glue will manage to get around your top wad, push it up and out of place and then solidify the mess. On the other hand, I hit the jackpot with Clear Gorilla glue, which works beautifully. It seals the over-shot wad to the brass case and all dried glue residue seems to blast out of the shell upon firing.
Here’s a little tip that will save you some frustration. Get a large nail a few inches long with a good, sharp point. After you seat the over-shot wad with your 5⁄8-inch dowel and are ready for the glue, hold the wad down with that sharp nail point placed in the middle while you put a few spots of glue around the edges. Keep the nail in place while you use a Q-tip cotton swab to “whoosh” the glue around. I use enough glue to completely seal the circumference of the wad, plus cover the entire top surface It sounds like a lot of glue, but it really isn’t. Once dry, you’ll have a waterproof shell. So why the nail? Because without it holding the wad down, when you are done whooshing with the swab, the thin wad will want to lift out of the case stuck to the cotton swab. Then, you’ll try to push it back with your finger, but you’ll only get a sticky fingertip with a wad stuck to it. The nail solves the problem. Whoosh the glue (if “whoosh” isn’t a standard and accepted reloading term, it ought to be,) lift the swab and lastly lift the nail. With the loads just described, I end up with about ¼-inch of remaining space in the brass shell. Everything is now in place just as it should be. In a few hours, the glue will set and you’ll be ready for the fun of making some booming smoke and delightfully bruising your shoulder.
I haven’t chronographed these loads or patterned them, but I seem to hit and miss clays and game with the same regularity as with modern factory smokeless ammunition. If they are shooting with less velocity, I certainly can’t tell, but I can assuredly tell you these black powder shells are indeed satisfying. I’ve been told that I smile a lot when shooting them.
With shells and a suitable shotgun, here are a few observations about the guns themselves. Hammerless guns are easy. You load them, push the safety back and you are ready for the woods. Push the safety forward and the front trigger shoots the more open choked right barrel while the rear trigger fires the tighter choked left tube. No doubt that’s why hammerless guns replaced hammer guns – simplicity and ease of shooting. Hammer doubles are different. There is no safety, so hammers are kept in the down or uncocked position for safely stalking game. When it’s time to shoot, pull the hammers and fire. Yeah, that sounds quick and easy, but it ain’t. Unless you are the size of Paul Bunyan and can pull both hammers at once, it is a one at a time procedure… all while a bird has flushed and is flying away. Here’s what I’ve found. Since I normally miss my first shot and need a follow-up, I’ve discovered that I hunt with my thumb on the inside hammer. That’s the hammer closest to my body. When a bird flushes I instantly thumb that hammer. As I mount the gun, I move my thumb to the outside hammer and cock that one. With some practice, and it does take practice, it is possible to have both hammers cocked pretty quickly. If the outside hammer is cocked first, it will most assuredly block you from thumbing the inside hammer. Like I said, this takes practice.
In the field, the Winchester Model 1887 lever gun is still a bit of a mystery to me. The hammer spur is barely exposed and the hammer spring on every 1887 I’ve tested is surprisingly strong. There is a long hammer throw to half-cock and then a very short stroke to full cock. As I just stated, the spring is a killer and the hammer tip is small. With practice, you might be able to carry the Winchester at half-cock and concentrate on getting the hammer all the way back when the time comes, but it won’t be effortless.
In cold weather, with anything but skin-tight gloves, it would be truly difficult or even impossible. You could always hunt with an empty chamber and lever a round when a bird flushes, but the Winchester has a very long lever throw and would be awkward at best. I’ve hunted with mine with the lever in the down or open position. Upon flushing game, I can lift the lever into battery while mounting the gun. Again, this is awkward and follow-up shots are really awkward. Maybe if I only had an 1887 Winchester and shot it exclusively for 20 or 30 years, I’d be able to figure it out. For now, I’m okay with it being a mystery.
Black powder shotshells aren’t complicated. With some simple tools and basic common sense, you can enjoy shooting black powder in your favorite shotgun, and have “loads” of fun doing it!