A COVID-19 Project
feature By: Bob Glodt | June, 21
I’ll be honest, since this is an article about a roundball rifle and not a cartridge gun, I was reluctant to submit this to The Black Powder Cartridge News. But in my own defense, I suspect that many “News” readers have been involved with long rifles at one time or another. It makes sense to me anyway, because most of us who compete in this sport have an appreciation and fondness for the unique styling that can only be found in the old Sharps, Winchester, Ballard, and Rolling Block single-shot rifles. For me anyway, the historical connection I get from shooting the old black-powder cartridge rifles is just about as important as the competition aspect of the game. There is no question that the American long rifle is in good company as far as beauty and styling is concerned with the old single-shot black-powder cartridge guns.
Since woodworking is one of my hobbies, and because I have made numerous long rifles over my lifetime, I really wasn’t too concerned about being able to satisfactorily complete one of Jim’s kits. Most of the rifles I have previously built were either made from scratch or individual components and pre-carved stocks that were purchased for the particular “school” of gunsmithing I was trying to replicate. Back then, a pre-carved stock was only roughly shaped for the style of rifle you were building, but at least the ramrod and barrel channels were cut for the barrel width requested. Although the pre-carved stocks were a vast improvement over having to band saw and shape a stock out of a maple blank, a considerable amount of work was still required to finish out a pre-carved stock. Back then, these stocks did not have the buttplate shape cut into the stock. Also, there was no inletting for the tang, triggers, trigger guard, ramrod pipes, side plate, nose cap and lock. Kibler’s stocks are shaped using a CNC machine and the various components mentioned above are precisely milled into the stock. The CNC produces an absolutely perfect wood to metal fit. On a Kibler kit, in addition to inletting everything mentioned above, the lock is drilled and tapped for side plate screws, the side plate to lock holes are drilled, the tang to trigger hole is drilled, and the underlug and ramrod pipe holes are drilled in the stock. Also, a stainless steel touchhole liner is installed and machined flush on the Green Mountain barrel that comes standard with Jim’s .54 caliber Colonial rifle kits.
I have no doubt there are probably some in this audience of readers who have the skills necessary to build a long rifle from a blank stock and would not be intimidated by all the shaping and inletting required to complete the project. I’ve built several long rifles this way, and in my opinion, starting from a blank or even a semi-inletted stock is tedious work. With Jim’s kits, all the tedious tasks are completed for you. With the aid of Jim’s videos, I believe just about anyone with basic tools, who is willing to work carefully, could put together one of these kits.
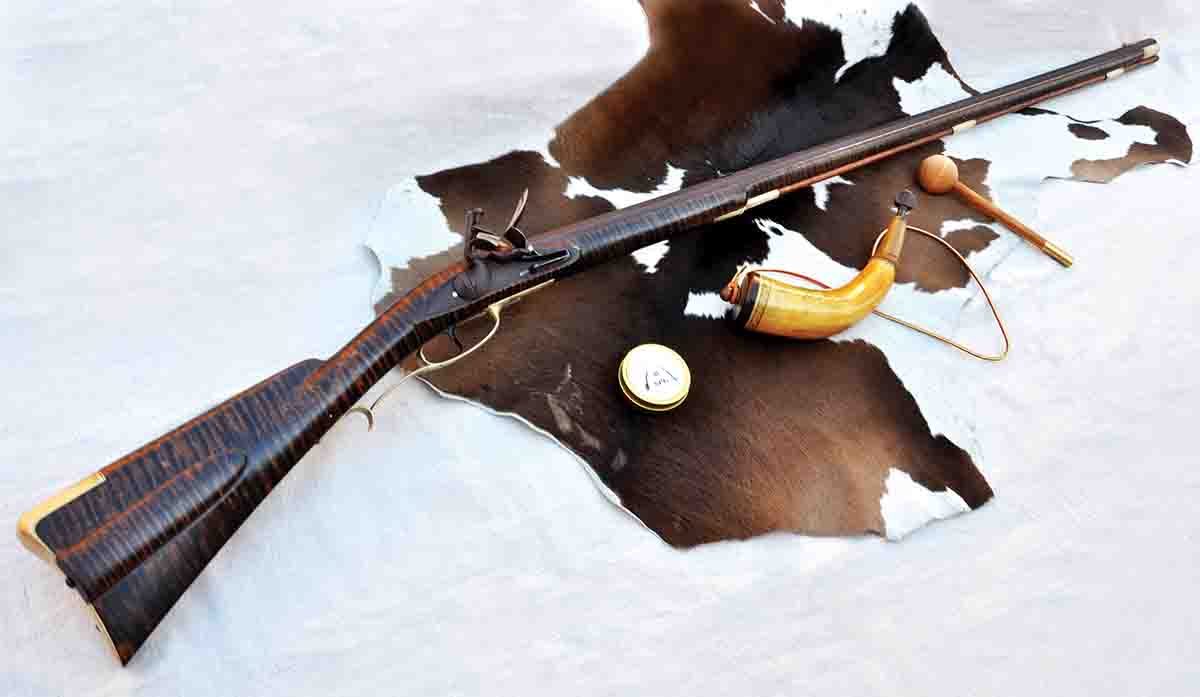
Jim offers two basic kits, a Colonial rifle kit and a Southern Mountain rifle kit. Specific information on the kits and components can be found on his website, kiblerslongrifles.com. In his videos, he hints that a Fowler and a Hawken rifle will more than likely be the next two kits he will bring out in the near future. I chose the Colonial rifle kit in .54 caliber for all the Kibler kits I have put together. In fact, I have completed three of Jim’s Colonial rifles and have two I’m working on right now. Of these five rifles, one was made for my son, two were made for friends, and two rifles are mine. All the rifles have extra fancy curly maple except one; the one on my bench now is stocked with plain walnut. I intend to try my hand at relief carving and antiquing on this rifle. Photographic examples of rifles Jim has built can be found at jimkibler.net. Jim’s craftsmanship is inspiring and beyond exceptional.
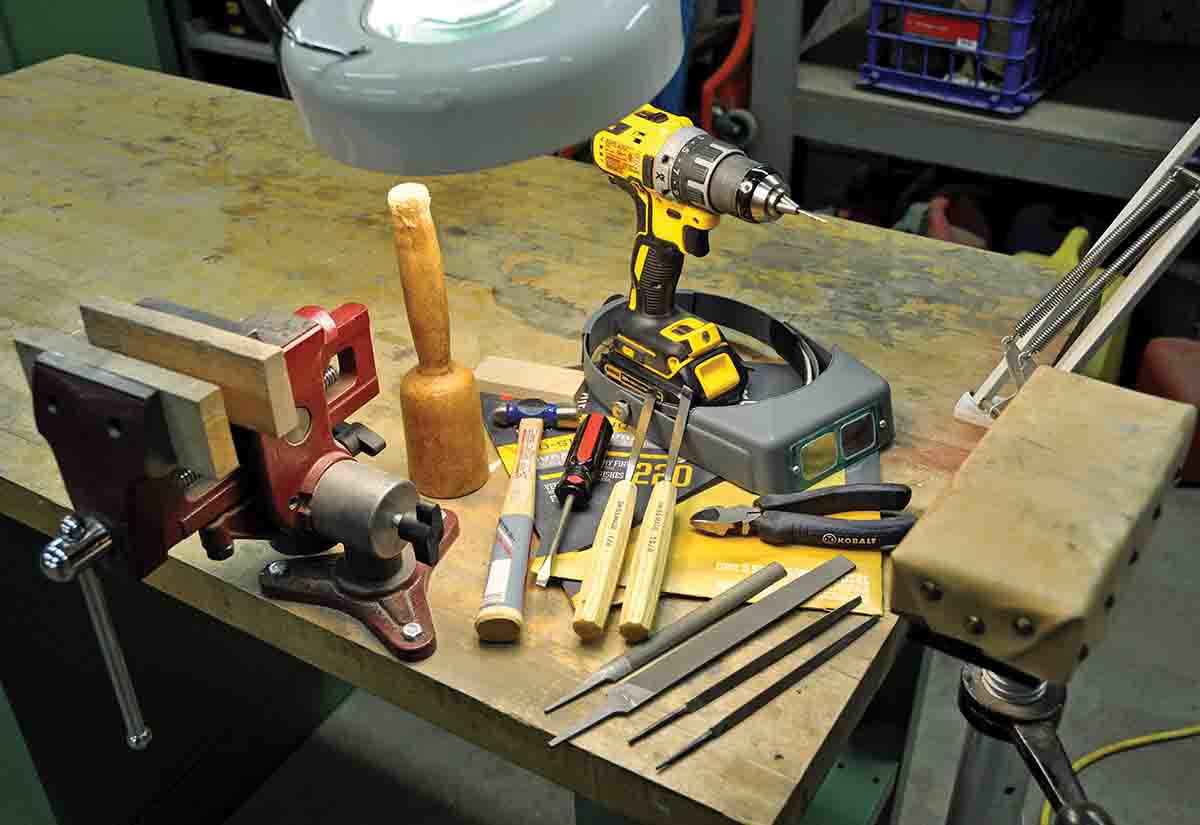
So, what does it take to complete one of Jim’s kits? The tools required are really basic. An electric drill, a few wood chisels, a couple of screwdrivers, Prussian blue, a small assortment of metal files, sandpaper, iron nitrate, wood finish, barrel browning solution, a padded vise and a method of supporting that portion of the rifle that extends beyond the vise are what is needed.
Before beginning work on a Kibler kit, I strongly suggest watching all of Jim’s videos at least twice. As you proceed through each step, I suggest you rewatch the video that pertains to the part where you are installing before beginning work. These videos contain valuable information and show sound techniques for accomplishing each task from start to finish. I also suggest assembling the kit in the order Jim outlines in the instructions. After completing several of Jim’s kits, I have suggestions of my own for assembling and completing a Colonial rifle. I will outline some of those tips and suggestions in the remainder of this article.
The first step in assembling a Colonial rifle is to install the swamped barrel with tang into the stock. Although the breech plug comes preinstalled to the barrel, there is very minor wood fitting required in the tang area. As Jim suggests in one of his videos, a light amount of Prussian blue should be applied to the tang to find the tight spots where a small amount of wood needs to be removed. When I say small amount, I’m talking slivers of wood about the thickness of a piece of cellophane. A very sharp wood chisel or carving chisel should be used to remove wood in the tang recess. I also suggest using a wooden mallet to lightly tap the tang into the stock. It is a process of lightly tapping the tang into the recess, removing the barrel from the stock, and then removing very small amounts of wood and repeating the process until a perfect fit is achieved. A word of caution, the wood to metal fit is so tight in the tang area on Jim’s kits, that proper removal of the barrel is absolutely necessary to prevent splintering out wood in the tang area while removing the barrel from the stock. This procedure for removing the barrel from the stock is shown in one of Jim’s videos and should be strictly adhered to. I have never damaged the wood in the tang area of the rifles I have assembled so far, but I can see how this would be possible.
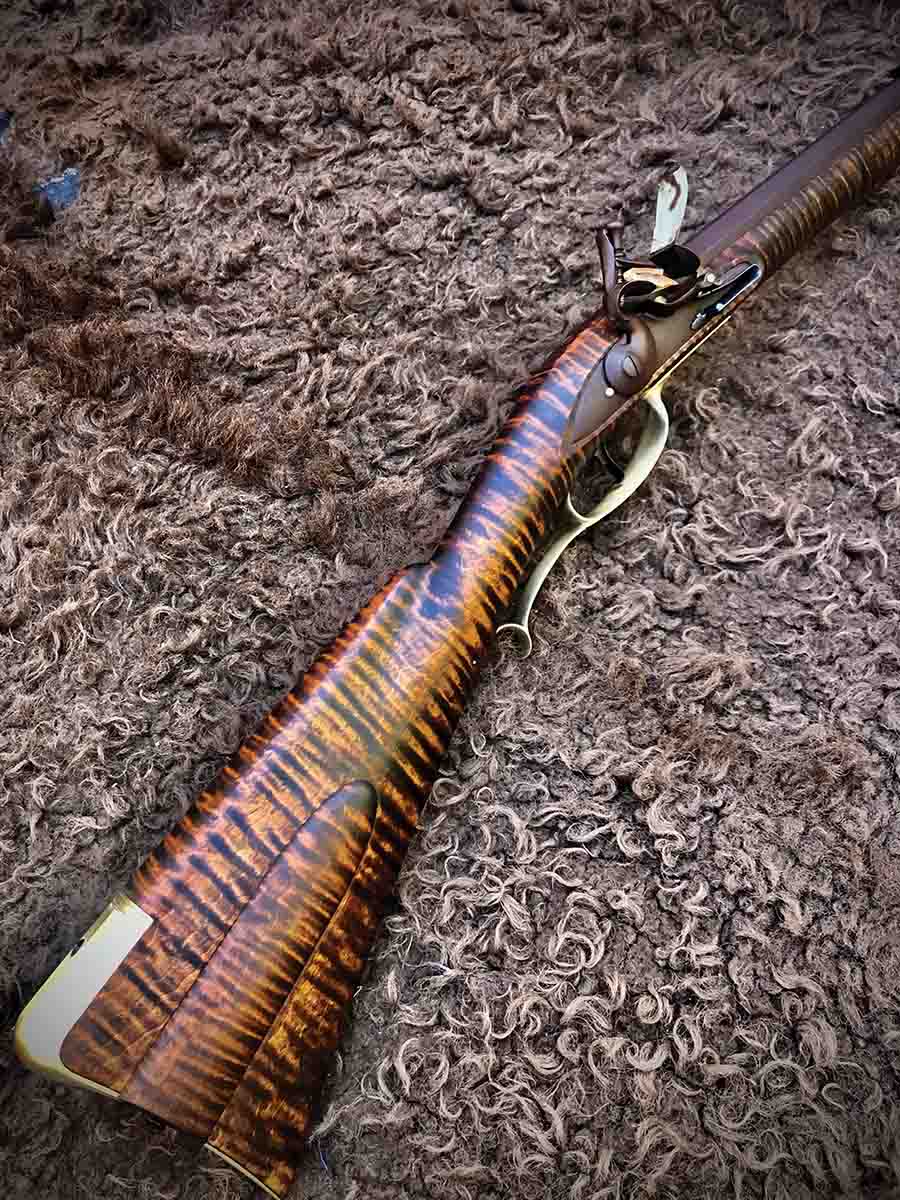
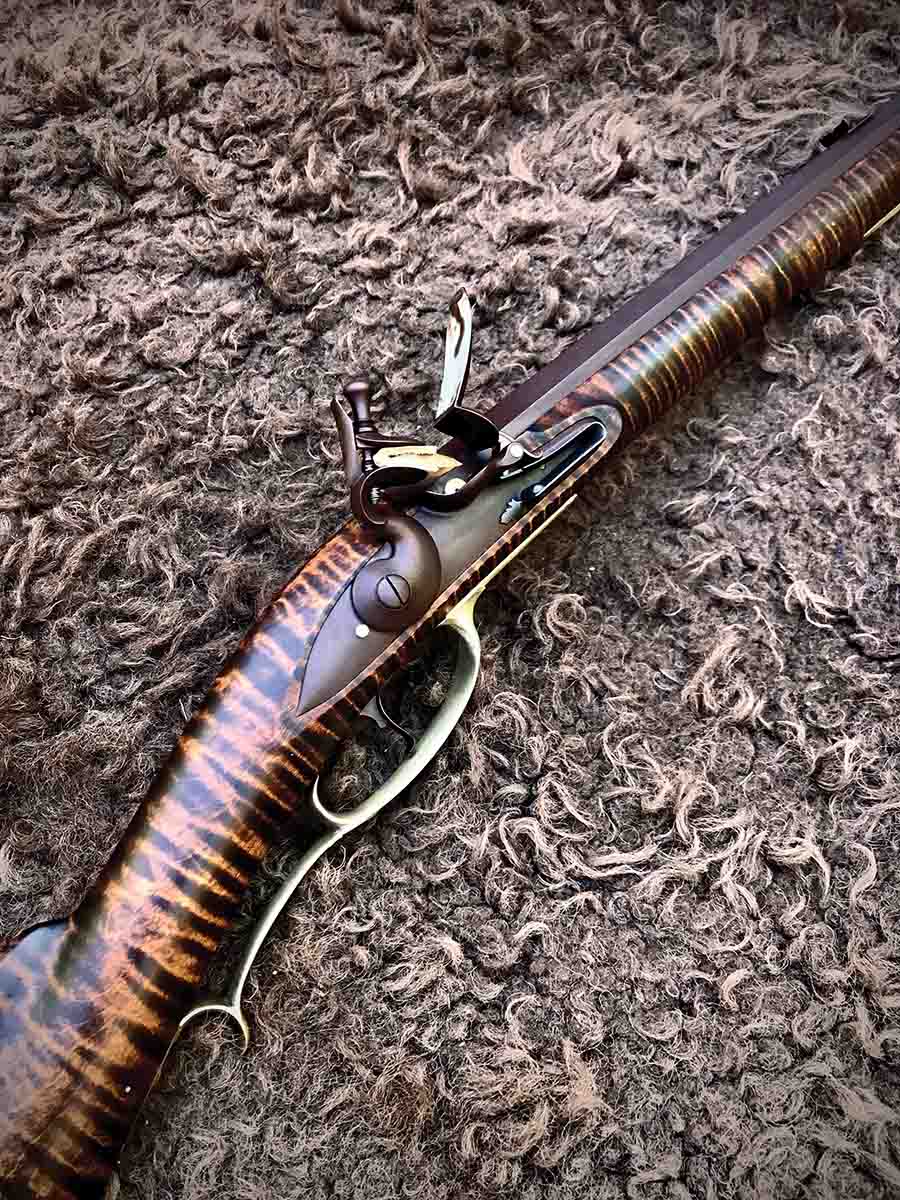
Either the buttplate or the lock can be installed next. The procedure for both is similar to fitting up the tang or trigger bar. Prussian blue should be applied lightly to the part in question to find the high spots that need to be removed. The lock should almost drop in place and very little wood removal is generally required. While we are on the subject of locks, I need to point out that Jim makes his own locks on a CNC machine. They are superb locks that are made with close tolerances, perfect styling and a fine finish that would be expected for anything produced on a CNC. The locks are also period correct in every regard.
Moving on to installing the buttplate: I suggest before beginning the installation of the buttplate that you rewatch Jim’s video that explains how this is done. On the scratch rifles I’ve built in the past, a band saw and wood rasps were generally needed to fit the buttplate to the stock. The buttplate recess is precut and the tolerances on Jim’s rifles are so close, that wood chisels or carving chisels are the tool of choice because only a slight amount of wood will be removed in spots where the buttplate meets up to the stock. On most of the Kibler buttplates I have installed, a notebook paper thick gap was present between the buttplate and the stock. This tiny gap is usually eliminated by tightening up the screws that hold the buttplate in place.
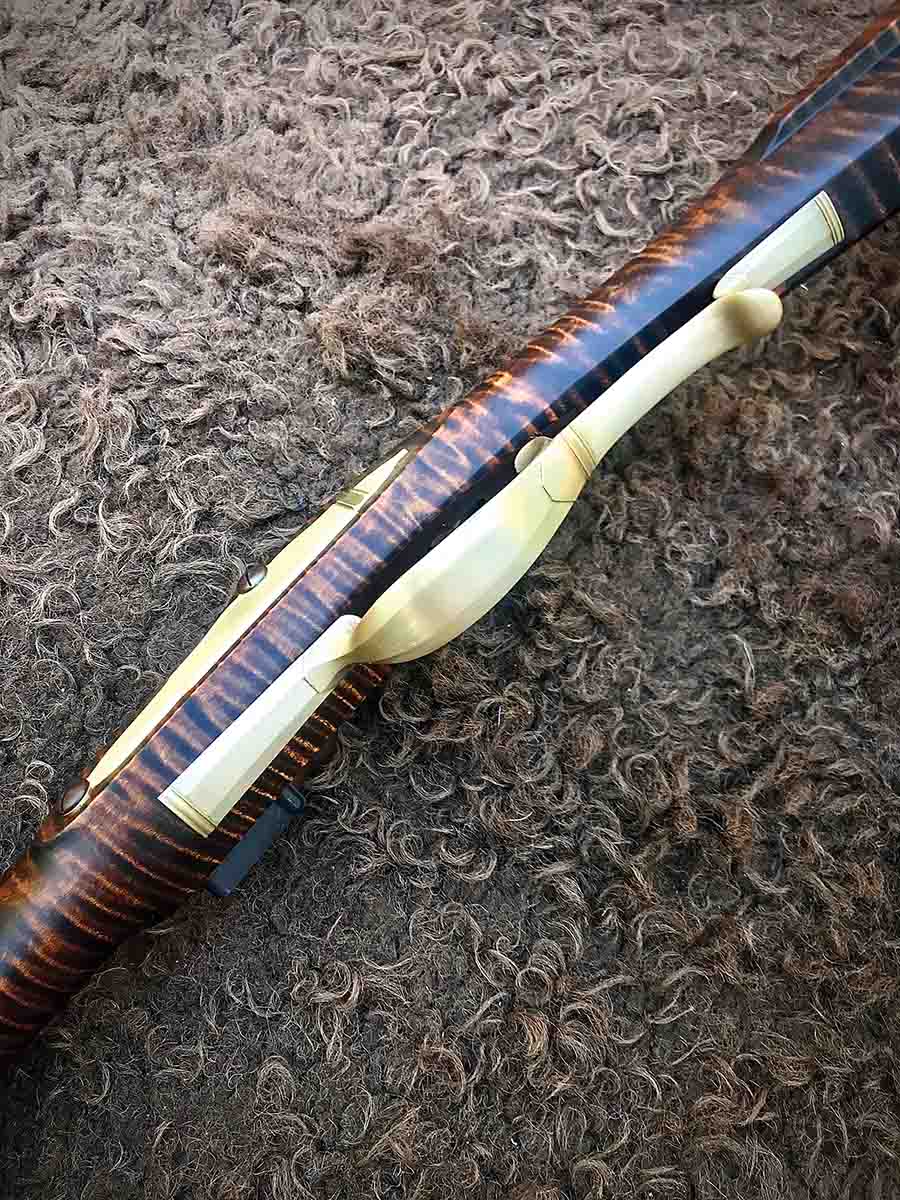
After the buttplate is installed, I fit up the sliding wooden patch box. To accomplish this, you will need a small three-corner file with one face ground smooth. Prepping a three-cornered file can be done on a belt sander or a sharpening wheel. Again, Jim’s videos adequately cover this installation and should be reviewed prior to starting this task. I can say from experience, though, that it is not necessary to remove wood from the patch box lid itself. The removal of material should be from the brass buttplate that the patch box lid slides over. This is a trial-and-error fitting process and requires careful work and attention to detail. When carefully installed, the patch box lid will slide into the stock with no wobble or side play. The kit comes with a patch box lock, which allows the lid to snap into place with an audible “click.”
All the castings to include the ramrod pipes, trigger guard and buttplate are wax cast and are about as good as it gets in terms of quality. The side plate is also made from brass; however, this part appears to have been cut on a CNC. Besides staining and finishing the stock, the most time-consuming part of assembling a Kibler kit is polishing out the buttplate, trigger guard, and ramrod pipes. I use various metal files and then sandpaper to achieve this purpose. The brass parts on original rifles were never buffed on a buffing wheel, and to do so will make the rifle look “cheesy.” I final finish brass with 320- or 400-grit paper and use small sandpaper-backed wooden sticks to maintain sharp edges on all brass parts.
The ramrod pipes are easy to install, and in most cases will drop right in place especially if the brass is polished before the fitting. Next, install the rear pipe first, being careful not to bend or misshape the pipe when tapping it into place with a wooden mallet. More than likely, the rear pipe, unlike the forward pipes, will require just a little wood removal. Prussian blue should be applied so high spots can be located and removed. Very sharp carving chisels should be used for removing slivers of wood when fitting up the rear pipe. But before installing the rear pipe, it will be necessary to sand down that part of the ramrod that fits into the stock. Make sure the ramrod will slide in and out easily without binding. Sanding of this portion of the ramrod is always required. Now, once you’ve got the rear pipe installed in the inlet make sure the ramrod will slide into the stock with the rear ramrod thimble in place. If the ramrod doesn’t slide in and out easily, the rear thimble is slightly misaligned, and additional fitting is required. Before pinning the ramrod pipes into the stock, slide the ramrod in and out to make sure there is no binding. Additional ramrod sanding will be required for the ramrod to pass smoothly through the middle and fore pipes as well.
Once the ramrod pipes are installed, I like to drill the underlugs and ramrod pipes. Holes are predrilled into the stock for both underlugs and ramrod pipes; however, the underlugs themselves are not predrilled. The ramrod pipes, however, are predrilled with a slotted hole, but I run a 1⁄16-inch drill bit through the predrilled hole and ramrod pipe. If this is not done properly and carefully, it is possible to enlarge the holes in the wood on the offside. When drilling out barrel under lugs, use a sharp drill bit and have the rifle clamped up in a vise. I prefer to drill horizontally rather than vertically. You should drill slowly paying particular attention to keeping the drill perfectly aligned with the hole.
The final steps in completing a Kibler rifle kit are to polish and brown the barrel and stain and finish the stock. The browning and stock finishing processes will have the most profound effect on the final appearance of the rifle. I will go into considerable detail on how to achieve satisfactory results.
The barrel should be draw filed and then polished out with sandpaper. Once again, Kibler’s videos show proper draw filing of the barrel. The overall objective is to achieve a uniform finish on the barrel with sharp edges where barrel flats meet. Like brass parts, buffing the barrel on a polishing wheel is not at all desirable. After draw filing, I start sanding beginning with 150-grit sandpaper and proceeding to a 320-grit paper. I wrap sandpaper around flat files or wooden blocks to ensure the barrel flats are square and the edges of the barrel have sharp corners.
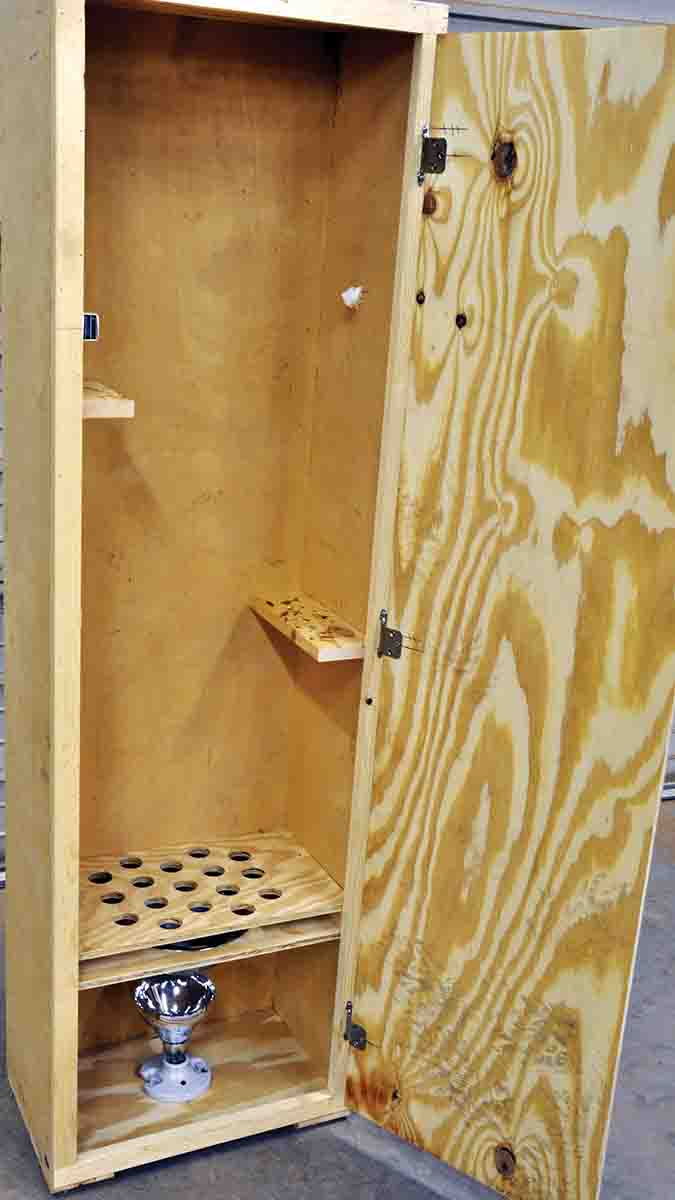
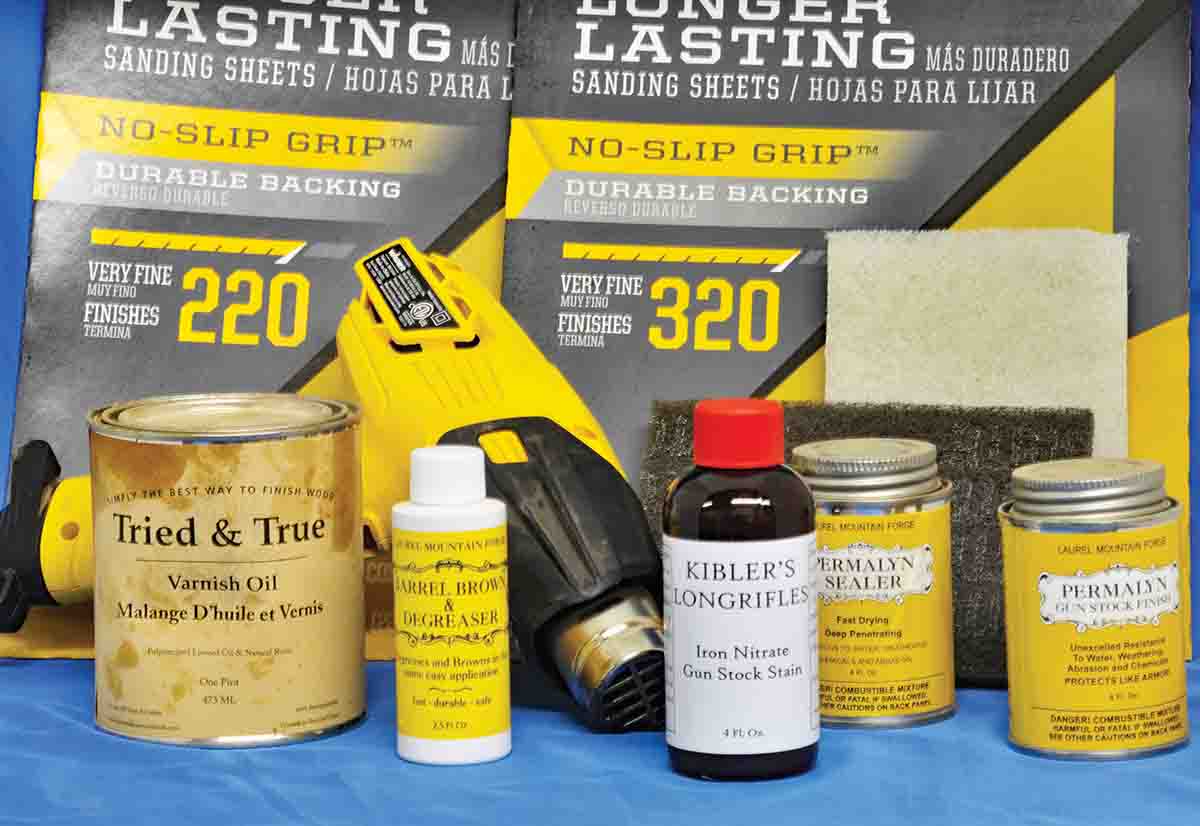
The biggest challenge I had in building a Kibler kit was achieving a uniform deep brown across the entire barrel. I used Laurel Mountain Forge barrel browning and degreaser solution; it is a slow browning process and requires multiple coats. I live in an area with low humidity, and high humidity is required to achieve a good brown using the Laurel Mountain Forge browning solution. I have tried heat browning on other long rifle projects and have always been disappointed with the results. After struggling for weeks with no success in achieving a uniform deep brown on the first Kibler barrel I worked on, I ended up making a humidity box. The box I built was made using half-inch plywood and it has a heat lamp and a pan of water in the bottom. This made all the difference in achieving a uniform brown. The second thing I learned about browning barrels was that Windex with ammonia or Windex with vinegar does wonders in prepping or degreasing a barrel for browning. Before applying the first coat of Laurel Mountain Forge browning solution, the muzzle end of the barrel was plugged with a wooden dowel to prevent browning solution from entering the barrel. I then sprayed Windex all over the barrel and the barrel was scrubbed with a fine to medium Scotch-Brite pad. The barrel was then rinsed with water and wiped dry with a paper towel, being careful not to touch the barrel with my bare hands. The first coat of Laurel Mountain Forge browning solution was then applied and the barrel was placed into the humidity box for six to eight hours and then removed and a second coat applied and put back in the humidity box for another six to eight hours.
It is important to apply the browning solution with a single uniform pass down each flat of the barrel using a round cotton pad saturated with browning solution. The round cotton pads women use to clean their faces work well. Do not use a back-and-forth motion or attempt to “scrub” the barrel when applying browning solution, as this will leave the barrel streaky. After several additional coats of browning solution, a small stainless steel or brass brush is used to remove browning residue and surface rust. This procedure is followed by cleaning the barrel with Windex, followed by several more coats of browning solution until the desired brown is achieved. It takes several applications of browning solution and subsequent cleaning with Windex for the barrel to begin the have the appearance of a uniform brown. I advise against using steel wool to polish the barrel between coats of browning solution. Most steel wool has an oil coating to prevent the pad from rusting and the oil tends to repel the browning solution and makes browning non-uniform. After achieving the desired brown, the acid in the browning solution should be neutralized by scrubbing the barrel with Arm and Hammer baking soda that has been dissolved in water. Then, dry the barrel with a paper towel and then heat the barrel using a propane torch and apply a coat of motor oil.
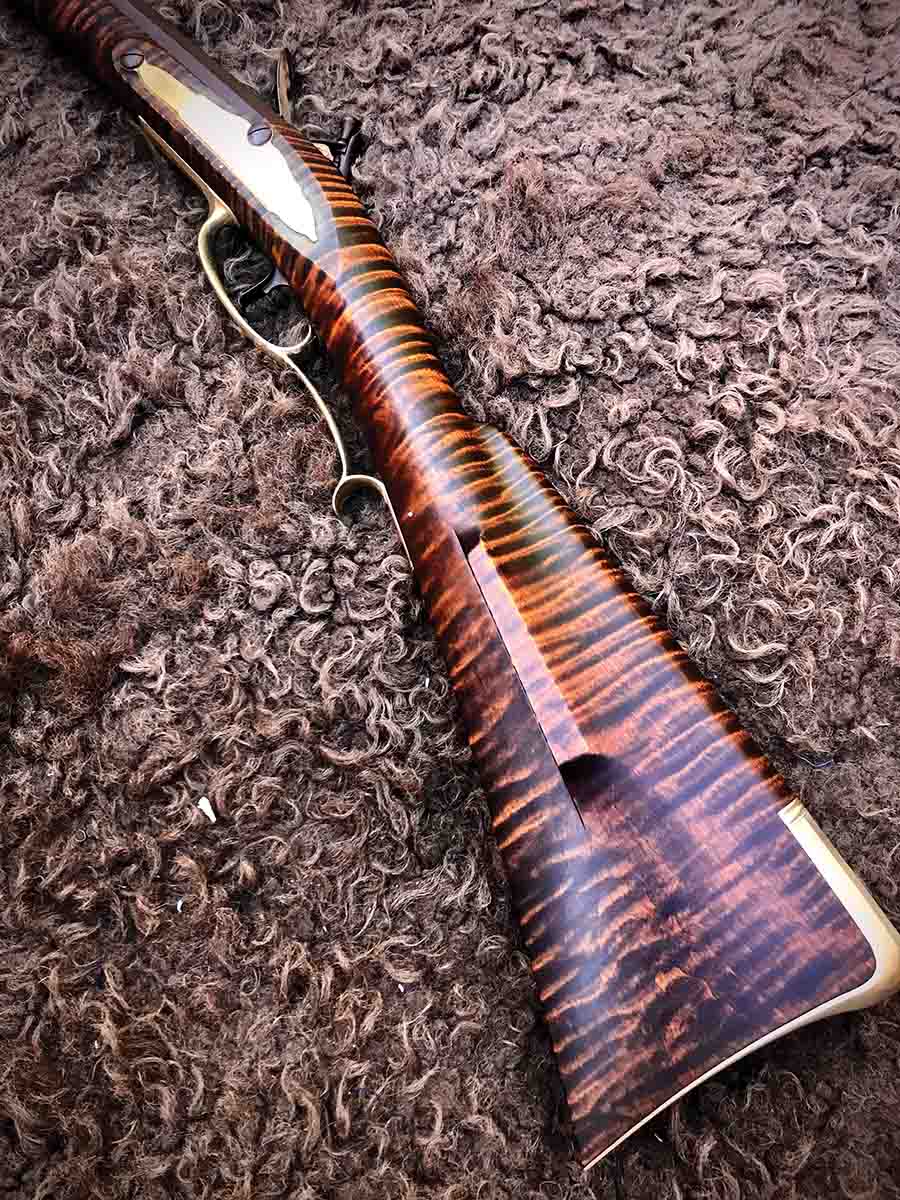
The Kibler stocks are completely CNC’d to their final shape and the use of wood rasps are not needed. But the stock does need to be sanded beginning with 150-grit sandpaper, then 220-grit paper, and finish with 320-grit paper. Raising the grain of the wood by using a water dampened sponge or towel should be done one or two times after sanding the stock with 320-grit paper. Of course, additional sanding is necessary with 320-grit after raising the grain. I used Kibler’s iron nitrate staining solution on all the curly maple stocks that I completed. Iron nitrate produces a beautiful contrast in the tight and loose grain of a curly maple stock and is nearly a foolproof stain to apply. Jim’s video covers this process in detail.
The finish I used on all the kits I have completed was Tried & True varnish oil (Item 126856) available through Woodcraft Supply at woodcraft.com. This finish dries very slowly and it takes 10-15 coats with one to two days drying time between coats to achieve a traditional looking finish. The finish should be applied, allowed to soak in for about 30 minutes, wiped off with a cotton cloth or paper towel and then allowed to dry for a day or two. Permalyn stock sealer and Permalyn stock finish can also be used as a stock finish with good results. Permalyn dries quicker than the Tried & True varnish oil.
Here’s a final word of caution. During the finishing process, varnish will collect in the holes that secure the trigger guard, barrel tenons and ramrod pipes. These holes should be freshened by carefully drilling with a 1⁄16-inch drill bit before installing the piano wire pins that secure these parts to the stock.
Now for the shooting. The guns I’ve built so far are accurate. I sighted my rifles at 50 and 100 yards. I started at 50 yards to get sights drifted where hits were centered right and left and then moved to 100 yards. The front sight will have to be filed down to get the gun to hit the point of aim, elevation wise. My groups at 50 yards were about 1.5 inches using a 70-grain, 3Fg black-powder load with a pillow ticking patch – very acceptable accuracy for an open-sighted long rifle. The touchhole on a Kibler rifle is properly located in relation to the pan to get reasonably fast ignition on a flintlock firearm.
In summary, it is without hesitation that I recommend a Kibler kit to those who may want to try their hand at building a beautiful long rifle.
At Kibler’s Longrifles, Katherine will be able to help with most questions regarding products, payments, shipments, policies, etc. She can be reached at 440-670-7883 or katherine@kiblerslongrifles.com. For more specific flintlock-related questions, or to talk with Jim, call 330-341-0675 or email at jim@kiblerslongrifles.com.